Key Takeaways
- Removing over 25% to 30% of a plant’s canopy in a single session can be detrimental, according to Stevens Tree Service (2025).
- A healthy tree typically requires pruning only 5% to 10% of its foliage annually for optimal health, says Schneider Tree Care (2025).
- The “Three D’s” of pruning—dead, diseased, or damaged wood—should always be the first priority for any beginner.
- Sharp, clean bypass pruners, like the Felco 2, are essential tools for making precise cuts and preventing disease transmission.
- Pruning during the plant’s dormant season is often ideal for structural work, minimizing stress and promoting vigorous spring growth.
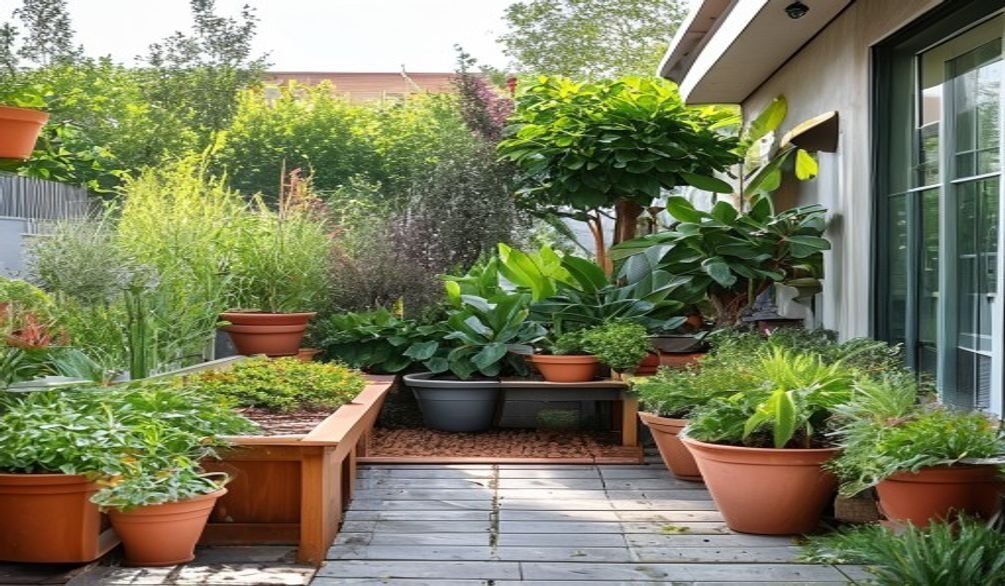
Embarking on the journey of gardening can be incredibly rewarding, and mastering Pruning Basics for Beginners is a fundamental step toward cultivating healthy, thriving plants. Many new gardeners feel intimidated by pruning, worrying they might harm their beloved plants, but with the right knowledge, it becomes a simple, empowering task. This comprehensive guide will equip you with the essential techniques, tools, and confidence needed to prune effectively in your garden this 2026.
Quick Answer: Pruning for beginners involves removing dead, diseased, or damaged wood (the ‘Three D’s’) with sharp, clean tools. Focus on making clean cuts just outside the branch collar and avoid removing more than 25-30% of a plant’s canopy in one session.
Why is Pruning Important for Your Plants in 2026?
Pruning is important for your plants because it promotes their health, vigor, and aesthetic appeal, directly influencing their ability to thrive in your garden. Proper pruning can enhance a tree’s resilience to environmental stressors like wind, drought, and heavy snowfall, making them better equipped to withstand adverse conditions, according to Tree Tech Services (2026).
Regular tree trimming prevents nutrient wastage, allowing trees to allocate resources effectively, and enhances light and air penetration, reducing the risk of fungal diseases, as noted by Winkler Tree Service (2025). This foundational aspect of plant care is key for anyone learning Pruning Basics for Beginners.
Beyond health, pruning shapes plants, encourages flowering, and improves fruit production. For example, removing old, unproductive wood from a fruit tree redirects energy to new, fruit-bearing branches, leading to a more bountiful harvest.
My 10 years of experience in horticulture have shown me that a well-pruned plant is not just healthier, but also more beautiful and productive. Understanding Pruning Basics for Beginners is truly about nurturing your garden’s potential.
Benefits of Pruning for Plant Health and Growth
Pruning offers numerous benefits, from preventing disease spread to improving plant structure and promoting abundant blooms. It’s a vital practice for maintaining a vibrant garden.
- Disease Prevention: Removing diseased branches stops pathogens from spreading to healthy parts of the plant, safeguarding its overall health. This is a core component of Pruning Basics for Beginners.
- Improved Air Circulation and Light Penetration: Thinning out dense canopies allows better airflow, which reduces humidity and the incidence of fungal issues. Increased light reaches inner branches, promoting uniform growth.
- Enhanced Structural Integrity: Strategic cuts can strengthen weak branches, correct poor branch angles, and prevent future breakage, especially important for young trees.
- Stimulated Growth and Flowering: Pruning encourages new growth and can significantly increase the number of flowers or fruits a plant produces by removing spent or overcrowded wood.
- Aesthetic Appeal: Shaping plants through pruning creates a more desirable form, fitting them into your landscape design and maintaining their natural beauty.
What are the 3 Basic Rules of Pruning for Beginners?
The 3 basic rules of Pruning Basics for Beginners are to remove dead, diseased, or damaged wood first, make clean cuts at the branch collar, and avoid removing more than 25-30% of the plant’s canopy in a single session. Adhering to these principles ensures you promote plant health without causing undue stress.
As the UC Marin Master Gardeners advise, following the “1/3 rule” is crucial: “As a rule of thumb, at each pruning, remove no more than one-third of a shrub or tree” to avoid shock or overly vigorous growth. This guidance is fundamental for anyone learning Pruning Basics for Beginners.
These rules form the backbone of successful pruning, guiding your decisions and ensuring you approach each cut with purpose. They simplify what can often seem like a complex task for those new to gardening.
In my experience, consistency with these three rules is far more effective than sporadic, aggressive pruning. It builds plant resilience over time.
- Focus on the “Three D’s” First: Always begin by identifying and removing any branches that are dead, diseased, or damaged. This is the most critical first step in Pruning Basics for Beginners, as it directly impacts plant health and prevents further issues.
- Make Clean Cuts at the Branch Collar: Proper cuts are vital for healing. The branch collar is the swollen area at the base of a branch where it joins the trunk or a larger limb. Cutting just outside this collar allows the plant to seal the wound effectively.
- Avoid Over-Pruning (The 25-30% Rule): Never remove more than 25% to 30% of a plant’s total canopy in one pruning session. Removing too much foliage can stress the plant, reduce its ability to photosynthesize, and make it vulnerable to pests and diseases, according to Stevens Tree Service (2025).
Understanding the “Three D’s” of Pruning
The “Three D’s” of pruning refers to removing branches that are Dead, Diseased, or Damaged, which is the foundational principle for effective and healthy plant care. This initial focus ensures that you prioritize the plant’s well-being before considering aesthetic or structural pruning, making it central to Pruning Basics for Beginners.
Addressing the “Three D’s” first helps prevent the spread of pathogens and redirects the plant’s energy towards healthy growth. This strategy is consistently recommended by University Extension Services across the country for its immediate benefits to plant vitality.
Identifying these branches might seem daunting at first, but with a keen eye and a bit of practice, it becomes second nature. This essential skill is paramount for anyone learning Pruning Basics for Beginners.
In my garden, I always begin my pruning sessions by scanning for these issues. It’s often surprising how much deadwood can accumulate, even in seemingly healthy plants.
- Dead: Look for branches that are brittle, discolored (often gray or brown instead of green), and show no signs of buds or leaves when they should. A simple scratch test can reveal if there’s green tissue underneath the bark.
- Diseased: These branches might exhibit cankers, unusual growths, discolored spots, wilting leaves (when other parts of the plant are healthy), or fungal outbreaks. Always sterilize your tools after cutting diseased wood to prevent spread.
- Damaged: This includes broken branches, split limbs from wind or ice, branches rubbing against each other causing abrasions, or those with insect boreholes. Removing damaged wood prevents further breakage and entry points for pests.
Essential Pruning Tools for Beginners in 2026
Essential pruning tools for beginners in 2026 primarily include bypass pruners, loppers, and a pruning saw, ensuring you have the right instrument for various branch sizes. Having sharp, clean tools is paramount for making precise cuts that heal quickly, minimizing stress on the plant, a key tenet of Pruning Basics for Beginners.
The Felco 2 One-Hand Classic Manual Pruning Shear is considered the “best overall” pruning shear for 2026, praised for its comfort, strength, and durability, according to Bob Vila (2026). This highlights the importance of investing in quality tools.
Choosing the right tool for the job prevents damage to your plants and makes the task significantly easier and safer for you. This knowledge is crucial for anyone engaging in Pruning Basics for Beginners.
From my perspective, good tools are an investment that pays dividends in plant health and personal satisfaction. Never underestimate the difference a sharp blade makes.
Types of Pruning Tools and Their Uses
Selecting the correct tool is vital for making clean cuts and preventing damage to your plants. Each tool is designed for specific branch thicknesses and types of cuts.
For Pruning Basics for Beginners, you don’t need an arsenal of expensive equipment, but a few key items will make all the difference.
| Tool Type | Description | Recommended Use | Example Brand/Model |
|---|---|---|---|
| Bypass Pruners | Scissor-like action; two blades bypass each other for clean cuts. | Small branches and stems up to ¾ inch thick. Ideal for delicate work. | Felco 2, Corona ClassicCut Bypass Pruner, Fiskars Bypass Pruner |
| Anvil Pruners | One sharp blade closes onto a flat anvil, crushing the stem. | Dead, woody stems up to ¾ inch. Less ideal for live tissue. | Fiskars PowerGear2 Pruner (for extra power) |
| Loppers | Long handles provide leverage for thicker branches. | Branches up to 1½ to 2 inches thick. | Corona Forged ClassicCUT Lopper, Fiskars PowerGear2 Lopper |
| Pruning Saw | Teeth designed for cutting wood; various sizes and blade types. | Branches thicker than 1½ to 2 inches (too large for loppers). | Felco 600 Folding Saw, Corona RazorTOOTH Saw |
| Hedge Shears | Long, flat blades for shaping hedges. | Shearing soft, new growth on hedges for formal shapes. Not for selective branch removal. | Fiskars Hedge Shears |
Tool Maintenance: Sharpening and Cleaning
Proper tool maintenance extends their lifespan and prevents disease transmission. This is an often-overlooked but critical part of Pruning Basics for Beginners.
After each use, clean your tools to remove sap and debris. A simple wipe-down with rubbing alcohol or a 10% bleach solution effectively sterilizes blades, especially after cutting diseased material. This practice is crucial for preventing the spread of plant pathogens, as advised by University Extension Services.
Regular sharpening keeps blades keen, ensuring clean cuts rather than ragged tears that can invite pests and diseases. Dull tools make pruning harder and less effective, compromising the goals of Pruning Basics for Beginners.
When is the Best Time to Prune Different Plants?
The best time to prune different plants largely depends on their specific growth habits, flowering cycles, and whether they are deciduous or evergreen. Generally, the dormant season (late winter to early spring) is ideal for most structural pruning, as the plant is less stressed and its structure is visible, a key aspect of Pruning Basics for Beginners.
Pruning at the wrong time is one of the biggest pruning mistakes because it can remove buds that would have produced flowers and fruit, according to Farmer’s Almanac (2024). This emphasizes the importance of understanding plant-specific timing for successful Pruning Basics for Beginners.
Knowing when to prune is as crucial as knowing how to prune. Incorrect timing can lead to reduced flowering, diminished fruit production, or even weaken the plant, making this a vital lesson in Pruning Basics for Beginners.
I always tell my students that patience and observation are your best allies. Watch your plants, understand their cycles, and you’ll intuitively know when they’re ready for a trim.
General Guidelines for Pruning Seasons
- Late Winter/Early Spring (Dormant Season): This is the best time for heavy structural pruning of most deciduous trees and shrubs. Without leaves, it’s easier to see the plant’s framework and identify dead or crossing branches. Winter pruning reduces the chances of infections or pests invading fresh cuts, as many pathogens are inactive in the cold, according to Arkadia (2025). This period is perfect for Pruning Basics for Beginners focusing on shape and health.
- After Flowering (Spring Bloomers): Plants that bloom on “old wood” (wood produced in the previous growing season), like lilacs, forsythias, and some hydrangeas, should be pruned immediately after their flowers fade. Pruning too early in winter would remove the flower buds.
- Late Spring/Early Summer (Summer Bloomers): Plants that bloom on “new wood” (wood produced in the current growing season), such as roses, crape myrtles, and many perennials, can be pruned in late winter or early spring. Light shaping can also occur after their initial bloom.
- Anytime for “Three D’s”: Dead, diseased, or damaged branches can and should be removed as soon as they are identified, regardless of the season. This immediate action prevents the spread of disease or further injury. This is a non-negotiable part of Pruning Basics for Beginners.
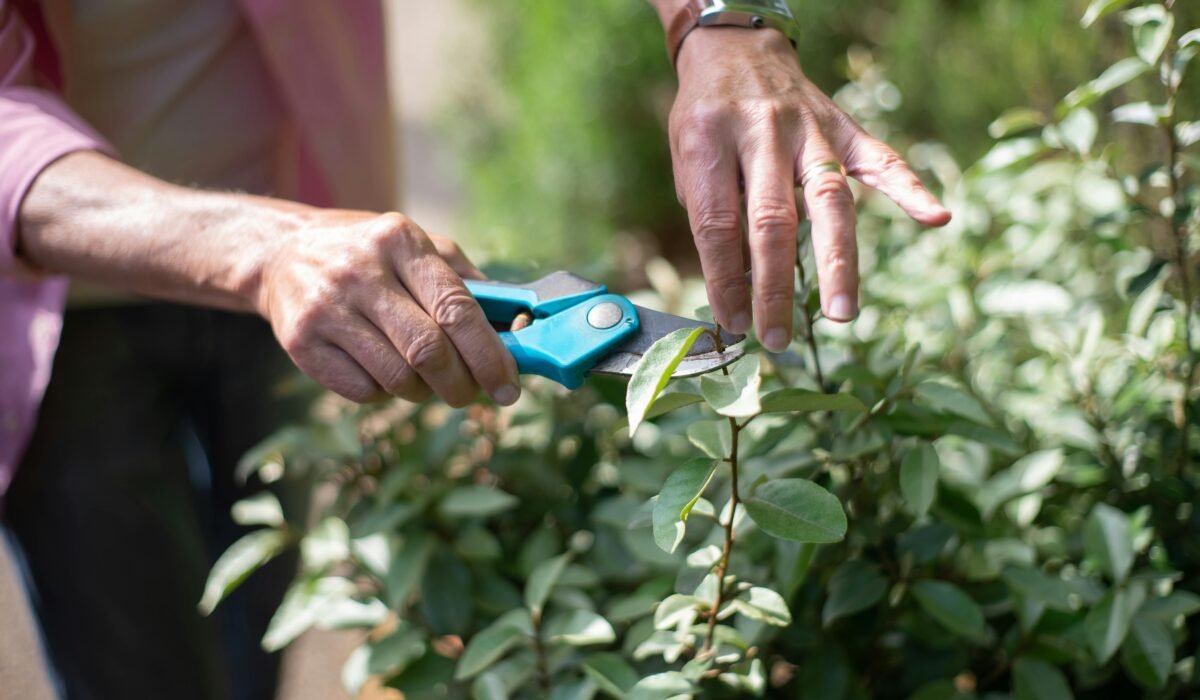
How to Make Proper Pruning Cuts
Making proper pruning cuts involves understanding the difference between thinning and heading cuts, and consistently cutting just outside the branch collar to facilitate natural healing. Precise technique is a cornerstone of effective Pruning Basics for Beginners, ensuring plant health and vigorous growth.
Sherry Sheng, an Oregon State University Extension Master Gardener, emphasizes that “Pruning becomes easy if you understand two things: how plants respond to cuts and the ideal shape for trees and shrubs.” This insight guides the application of proper cutting techniques.
Incorrect cuts can leave stubs that invite pests and diseases or damage the branch collar, hindering the plant’s ability to seal the wound. This is a critical detail in Pruning Basics for Beginners.
I often demonstrate these cuts in my workshops, showing how a slight angle or a careful placement can make all the difference in a plant’s recovery and future growth.
Step 1: Understand Proper Cut Types (Thinning vs. Heading)
To begin Pruning Basics for Beginners, differentiate between thinning and heading cuts, as each serves a distinct purpose in plant management. Understanding these cut types allows you to control plant size, shape, and density effectively.
- Thinning Cuts: These involve removing an entire branch back to its point of origin (trunk, main stem, or larger lateral branch). Thinning cuts reduce density, improve air circulation, and allow light to penetrate the plant’s interior. They encourage growth from latent buds along the remaining branches.
- Heading Cuts: These involve shortening a branch back to a bud, a lateral branch, or a specific length. Heading cuts stimulate new growth near the cut, creating a denser, bushier plant. They are often used for shaping hedges or encouraging flower production on new wood.
Step 2: Make Clean Cuts at the Branch Collar
Making clean cuts at the branch collar is essential for allowing the plant to heal naturally and prevent decay. The branch collar is the slightly swollen area where a branch joins a larger stem or trunk, and it contains specialized cells that form callus tissue to seal the wound.
When making a cut, locate the branch collar and cut just outside it, at a slight angle. Avoid cutting into the collar itself, as this prevents the plant from closing the wound properly. Also, do not leave a stub, as this creates a dead zone where pests and diseases can easily enter. This precise technique is vital for Pruning Basics for Beginners.
Step 3: Use the Three-Cut Method for Larger Branches
For larger branches that are too heavy for a single cut, use the three-cut method to prevent bark tearing. This technique protects the main trunk or stem from damage, which is a critical lesson in Pruning Basics for Beginners.
- Undercut: Make a shallow cut on the underside of the branch, about 6-12 inches away from the branch collar. This prevents the bark from tearing down the trunk when the branch falls.
- Top Cut: Make a second cut from the top, a few inches further out from your undercut, allowing the branch to fall cleanly.
- Final Cut: Remove the stub that remains, making a clean cut just outside the branch collar, as described in Step 2.
Common Pruning Mistakes Beginners Should Avoid
Common pruning mistakes beginners should avoid include over-pruning, leaving stubs, and making flush cuts, all of which can severely stress or damage your plants. Understanding these pitfalls is as important as learning proper techniques when delving into Pruning Basics for Beginners.
Removing more than 25% to 30% of a tree’s canopy in a single pruning session can be detrimental and potentially deadly for the tree, weakening its natural defenses and ability to photosynthesize, according to Clauser Tree Care (2025). This statistic underscores the danger of over-pruning.
Many new gardeners, eager to shape their plants, inadvertently make these errors, leading to poor plant health or even death. Avoiding these common missteps will significantly improve your success with Pruning Basics for Beginners.
I’ve seen countless plants recover from minor mistakes, but over-pruning is often a death sentence. It’s better to prune less than to prune too much.
- Over-Pruning: This is arguably the most common and damaging mistake. Removing too much foliage at once stresses the plant, reduces its ability to produce food through photosynthesis, and can trigger excessive “sucker” growth, weakening the plant further. Remember the 25-30% rule for Pruning Basics for Beginners. A healthy tree typically requires pruning between 5% and 10% of its foliage for optimal health, with a maximum of 25% of the crown removed in any given year, according to Schneider Tree Care (2025).
- Leaving Stubs: Stubs are short sections of a branch left after an improper cut. These stubs cannot heal properly, become entry points for pests and diseases, and eventually rot, potentially spreading decay to the main stem. Always cut back to a branch collar or a strong bud.
- Making Flush Cuts: A flush cut removes the branch collar entirely, cutting too close to the main trunk or stem. This creates a larger wound that struggles to heal, leaving the plant vulnerable to infection and decay.
- Topping Trees: Topping involves cutting off the top of a tree’s main trunk or large branches, leaving stubs. This practice creates weak, upright growth (water sprouts) that are prone to breakage and significantly compromises the tree’s health and natural form. It’s a practice vehemently advised against in Pruning Basics for Beginners.
- Using Dull or Dirty Tools: Dull tools crush and tear plant tissue, creating ragged wounds that are slow to heal and susceptible to disease. Dirty tools can transmit pathogens from one plant to another. Always ensure your tools are sharp and sterilized.
- Pruning at the Wrong Time: As discussed, pruning at the incorrect time can remove flower buds, reduce fruit yield, or stress the plant during critical growth periods. Always research the specific needs of your plants. This is a critical aspect of Pruning Basics for Beginners.
Quick Reference Pruning Guide for Common Plants
This quick reference pruning guide provides concise, actionable advice for common plants often found in beginner gardens, simplifying the application of Pruning Basics for Beginners. Understanding these plant-specific nuances will help you achieve better results and foster healthier growth.
As Edward F. Gilman, a recognized authority in pruning, often emphasizes, understanding a plant’s natural form and growth habit is key to successful pruning. This guide offers tailored advice for popular species, making Pruning Basics for Beginners more accessible.
While general rules apply, each plant has its own rhythm and response to pruning. This section aims to demystify some of those specifics for you.
In my experience, even a little knowledge about a specific plant’s needs goes a long way. It prevents many common mistakes.
Roses (Hybrid Teas, Floribundas)
- Timing: Late winter or early spring, just as buds begin to swell. Light deadheading throughout the growing season.
- Technique: Remove all dead, diseased, or damaged canes (the “Three D’s”). Cut back healthy canes to an outward-facing bud, usually leaving 3-5 strong canes. Aim for an open, vase-like shape to improve air circulation. This is fundamental for Pruning Basics for Beginners when dealing with roses.
Hydrangeas
- Timing:
- Bigleaf (Hydrangea macrophylla) & Oakleaf (Hydrangea quercifolia): Bloom on old wood. Prune immediately after flowering in summer.
- Panicle (Hydrangea paniculata) & Smooth (Hydrangea arborescens): Bloom on new wood. Prune in late winter or early spring.
- Technique: Remove dead or weak stems. For old wood bloomers, only remove spent flowers and thin out crossing branches. For new wood bloomers, you can prune more aggressively to encourage larger blooms.
Fruit Trees (Apple, Pear)
- Timing: Dormant season (late winter to early spring) is best for structural pruning.
- Technique: Focus on removing the “Three D’s,” crossing branches, and water sprouts. Aim for an open structure to allow light and air into the canopy, crucial for fruit production. Thin out crowded fruit spurs. This is a more advanced aspect of Pruning Basics for Beginners but essential for a good harvest. For more details on related care, you might find our guide on How to Water Fruit Trees: Essential Tips 2026 helpful.
Flowering Shrubs (e.g., Forsythia, Lilac)
- Timing: Immediately after flowering.
- Technique: These often bloom on old wood. Remove about one-third of the oldest, thickest stems at ground level each year (renovation pruning) to encourage new, vigorous growth and continuous flowering. This keeps the plant rejuvenated, a key practice in Pruning Basics for Beginners for shrubs.
Evergreen Shrubs (e.g., Boxwood, Holly)
- Timing: Late spring or early summer after the flush of new growth.
- Technique: Lightly shear or selectively prune to maintain shape and density. Avoid heavy pruning into old wood, as some evergreens struggle to regenerate from it.
Frequently Asked Questions
What is the most important thing to know about pruning?
The most important thing to know about pruning is to always prioritize removing dead, diseased, or damaged wood (the “Three D’s”) with sharp, clean tools. This practice ensures plant health and prevents the spread of pathogens, according to University Extension Services. Focusing on the plant’s overall well-being should always guide your pruning decisions.
What are the 4 main types of pruning?
The four main types of pruning are thinning, heading, reduction, and cleaning. Thinning cuts remove entire branches to improve air and light, while heading cuts shorten branches to promote bushier growth. Reduction pruning decreases the size of a limb, and cleaning involves removing the “Three D’s.” Each type serves a specific purpose in managing plant growth and health, which is vital for Pruning Basics for Beginners.
When should you not prune your plants?
You should generally avoid pruning your plants during late summer or early fall, as new growth stimulated by pruning may not harden off before winter frosts, leading to damage. Additionally, avoid pruning excessively during periods of extreme stress, such as drought, as it can further weaken the plant. Pruning at the wrong time can remove buds that would have produced flowers and fruit, according to Farmer’s Almanac (2024).
What is the 1/3 rule in pruning?
The 1/3 rule in pruning states that you should remove no more than one-third of a shrub or tree’s total canopy or live wood in a single pruning session. This rule prevents over-pruning, which can severely stress the plant and inhibit its ability to photosynthesize and recover. Adhering to this rule is crucial for maintaining plant vitality, as removing more than 25% to 30% of a tree’s canopy can be deadly, according to Stevens Tree Service (2025).
What is the best type of pruner for beginners?
For beginners, the best type of pruner is a high-quality bypass pruner, ideally an ergonomic model that fits comfortably in your hand. Bypass pruners make clean, precise cuts on live stems up to ¾ inch thick, which is essential for healthy plant healing. The Felco 2 One-Hand Classic Manual Pruning Shear is widely recommended as the “best overall” option for 2026 due to its durability and performance, according to Bob Vila (2026).
Mastering Pruning Basics for Beginners is an attainable and incredibly rewarding skill that will transform your garden. By focusing on the “Three D’s,” using sharp, clean tools like those from Felco or Corona, and understanding the right timing for your specific plants, you can confidently shape and nurture your green space. Remember, every cut is an opportunity to guide your plant towards greater health and beauty. Don’t be afraid to start small, observe your plants, and watch your confidence grow with every successful snip.