Key Takeaways
- 43% of American households now grow food at home, often starting plants from seeds indoors, according to Cooped Up Life (2026).
- The average return on food gardening investment was 757% in 2021, highlighting the financial benefits of home gardening.
- 55% of American households (71.5 million) are engaged in gardening activities, ranking the U.S. among the top 3 gardening countries worldwide as of November 2025.
- Tomatoes are the most popular homegrown vegetable, found in 86% of food gardens, according to RubyHome (2025).
- Proper hardening off is crucial, as it gradually acclimates indoor-grown seedlings to outdoor conditions before transplanting.
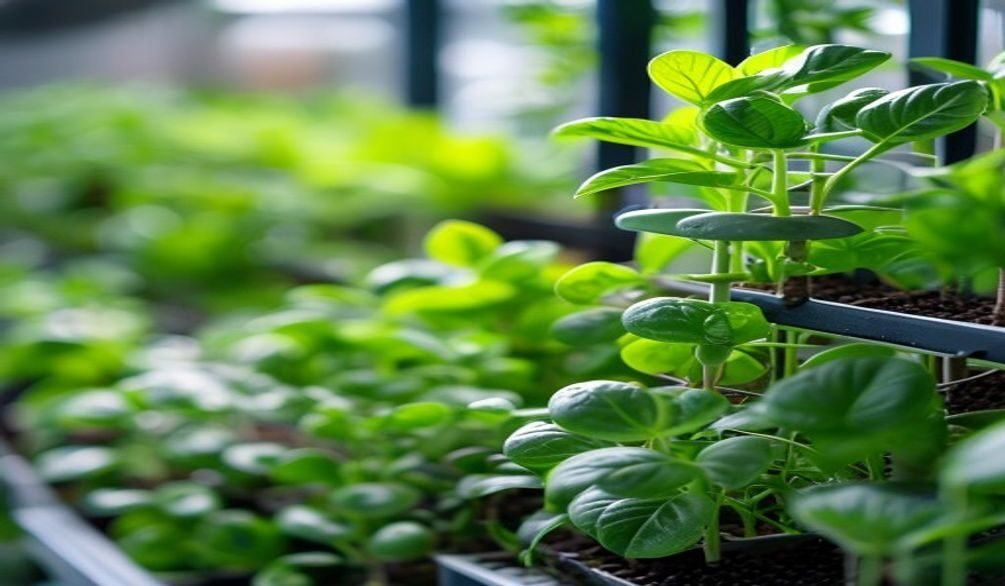
Are you eager to extend your gardening season, save money, and cultivate a wider variety of plants from the comfort of your home? **Indoor Seed Starting for Vegetables** offers a rewarding path to achieve these goals, transforming a simple seed into a thriving plant ready for your garden. In my 10 years of experience, mastering this technique is a game-changer for any gardener, setting the foundation for a bountiful harvest and allowing you to grow vegetables that might otherwise be unavailable or expensive. This guide will provide you with the essential tips and expert insights to successfully embark on your indoor seed starting journey.
Quick Answer: To successfully start vegetable seeds indoors, provide adequate light (grow lights are best), maintain consistent warmth and humidity, use a sterile seed-starting mix, ensure proper drainage, and harden off seedlings before transplanting to the garden.
Why start your vegetable seeds indoors?
Starting your vegetable seeds indoors offers significant advantages over direct sowing, primarily extending your growing season and providing greater control over your plants’ early development. This practice allows you to get a head start on crops that require a long growing season or are sensitive to late frosts, ensuring a more productive garden. Logan Hailey, a gardening expert and former organic farmer, explains that “Starting them indoors will help get them ready for spring planting and give your plants a head start.”
The popularity of home gardening, including **Indoor Seed Starting for Vegetables**, continues to rise, with 55% of American households (71.5 million) engaged in gardening activities as of November 2025, according to research by Scotts Miracle-Gro and Wakefield (2025). This trend highlights a widespread desire for fresh produce and the satisfaction of growing your own food. Furthermore, 43% of American households now grow food at home, often starting those plants from seeds indoors, according to Cooped Up Life (2026).
Beyond extending the season, **Indoor Seed Starting for Vegetables** can also lead to substantial cost savings. The average return on food gardening investment was an impressive 757% in 2021, demonstrating the financial benefits of cultivating your own produce. Moreover, starting seeds indoors allows for a wider selection of heirloom and specialty varieties that might not be available as transplants at local nurseries. Mike Reiber, CEO of Axiom Marketing, noted that 47.6% of gardeners spent more time gardening in 2025, the highest level since 2022, indicating a growing commitment to gardening activities. This sustained interest suggests that more people are discovering the joys and benefits of **Indoor Seed Starting for Vegetables**.
Essential indoor seed starting supplies
Successful **Indoor Seed Starting for Vegetables** relies on having the right equipment to provide optimal conditions for germination and seedling growth. Investing in quality supplies from the outset can prevent common issues and ensure robust seedlings. From my perspective, choosing the right tools is just as important as the seeds themselves.
Here are the critical items you’ll need for effective **Indoor Seed Starting for Vegetables**:
- Seed Starting Mix: This specialized soil is sterile, lightweight, and fine-textured, providing the ideal environment for delicate seedlings. Unlike garden soil, it’s free of weed seeds and pathogens that can harm young plants. Look for brands like Scotts Miracle-Gro or Jiffy, which offer reliable seed starting mix options.
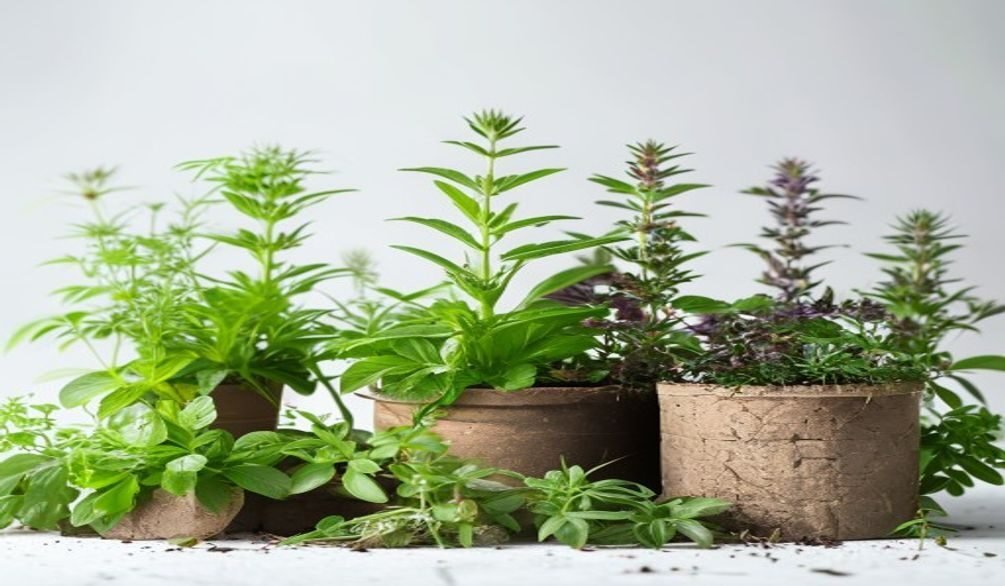
- Seed Trays and Containers: You’ll need containers with good drainage. Options range from reusable plastic trays (like those found in the Bonviee Seed Starting Kit), biodegradable peat pots, or even DIY seed starting containers from recycled materials. The Burpee Seed Starting Kit is a popular choice, often including trays and coir pellets.
- Grow Lights for Seed Starting: Natural light from a window is rarely sufficient, leading to leggy seedlings. Full-spectrum grow lights are essential to provide the intense light necessary for strong growth. VIVOSUN offers various LED grow lights that are effective for indoor seed starting setups.
- Heat Mats for Germination: Many vegetable seeds require consistent warmth to germinate efficiently. A heating mat placed under your seed trays ensures the soil temperature remains optimal, significantly improving germination rates. The VIVOSUN Heating Seed Starting Kit is a great example, featuring a heated tray and humidity dome.
- Humidity Domes: These clear plastic covers fit over seed trays to create a mini-greenhouse effect, maintaining high humidity crucial for germination. Many seed starting kits, like the Jiffy Greenhouse Kit, include these domes.
- Watering Can or Spray Bottle: A gentle watering method is vital to avoid disturbing delicate seeds and seedlings. A small watering can with a fine rose or a spray bottle works best.
- Plant Labels: Don’t underestimate the importance of labeling your trays immediately after sowing. It’s easy to forget what you planted where, and plant labels help keep everything organized.
These supplies form the backbone of a successful **Indoor Seed Starting for Vegetables** operation, ensuring your young plants get the best possible start.
How to start vegetable seeds indoors: 7 steps
Successfully starting vegetable seeds indoors involves a methodical approach, ensuring each step contributes to the health and vitality of your future plants. Follow these seven essential steps to master **Indoor Seed Starting for Vegetables**.
Step 1: gather essential supplies
Before you begin sowing, collect all necessary items, including seeds, seed starting mix, trays, grow lights for seed starting, and heat mats for germination. Having everything organized beforehand streamlines the process and ensures no crucial element is overlooked.
Step 2: prepare seed starting mix
Moisten your seed starting mix thoroughly before adding it to your trays. The mix should be damp but not waterlogged, resembling a wrung-out sponge, which is critical for consistent moisture around the seeds. This prevents dry pockets and ensures even hydration for optimal germination.
Step 3: sow seeds correctly
Plant seeds at the depth recommended on the seed packet, typically two to three times their diameter. Gently press the seeds into the moist mix and cover them lightly, as proper depth ensures good seed-to-soil contact and facilitates emergence.
Step 4: provide optimal light
Place your seed trays under grow lights for seed starting immediately after sowing, even before germination. Seedlings require 14-16 hours of intense light daily to prevent them from becoming leggy seedlings, ensuring strong, compact growth. Position the lights just a few inches above the soil surface.
Step 5: manage temperature & humidity
Maintain consistent warmth using heat mats for germination, typically between 70-75°F (21-24°C) for most vegetables, and cover trays with humidity domes. This controlled environment promotes rapid and uniform germination, which is vital for starting seeds indoors successfully.
Step 6: water & fertilize seedlings
Keep the seed starting mix consistently moist but never soggy, watering from the bottom to encourage root growth and prevent damping off. Once seedlings develop their first true leaves, begin feeding them with a diluted liquid fertilizer, providing essential nutrients for continued development.
Step 7: harden off before transplanting
Gradually acclimate your seedlings to outdoor conditions over 7-14 days before transplanting them into your garden. This hardening off process prepares them for the harsher outdoor environment, reducing transplant shock and increasing their survival rate.
Troubleshooting common indoor seedling problems
Even with careful attention, issues can arise during **Indoor Seed Starting for Vegetables**, but most common problems have straightforward solutions. Recognizing these signs early is key to maintaining healthy seedlings.
The table below outlines frequent challenges encountered during **Indoor Seed Starting for Vegetables** and effective remedies:
| Problem | Cause | Solution |
|---|---|---|
| Leggy Seedlings | Insufficient light; grow lights too far away. | Lower grow lights for seed starting to 2-4 inches above plants; increase light duration to 14-16 hours. |
| Damping Off | Fungal disease due to overwatering, poor air circulation, or non-sterile mix. | Use sterile seed starting mix; improve air circulation with a fan; water from bottom; ensure good drainage. |
| Yellowing Leaves | Nutrient deficiency (often nitrogen) or overwatering. | Apply diluted liquid fertilizer; check moisture levels and adjust watering schedule. |
| Mold on Soil Surface | High humidity and poor air circulation. | Remove humidity dome after germination; use a small fan for air movement; avoid overwatering. |
| Slow Growth/Stunted | Insufficient light, low temperature, or lack of nutrients. | Ensure adequate grow lights for seed starting; check soil temperature (use heat mats if needed); fertilize appropriately. |
For instance, preventing leggy seedlings is a common concern; it arises when plants stretch desperately for light. My experience shows that grow lights for seed starting must be positioned very close to the seedlings, often just a few inches above the foliage, to provide the intensity they need. Damping off prevention is another critical aspect of successful **Indoor Seed Starting for Vegetables**, which is typically addressed by using a sterile seed starting mix, ensuring proper air circulation, and avoiding overwatering. By addressing these issues promptly, you can ensure your plants thrive.
Vegetable-specific indoor starting requirements
While general guidelines apply to **Indoor Seed Starting for Vegetables**, many popular vegetables have distinct requirements for optimal germination and growth. Understanding these specific needs can significantly boost your success rate. From my gardening career, I’ve learned that treating all seeds the same is a recipe for disappointment.
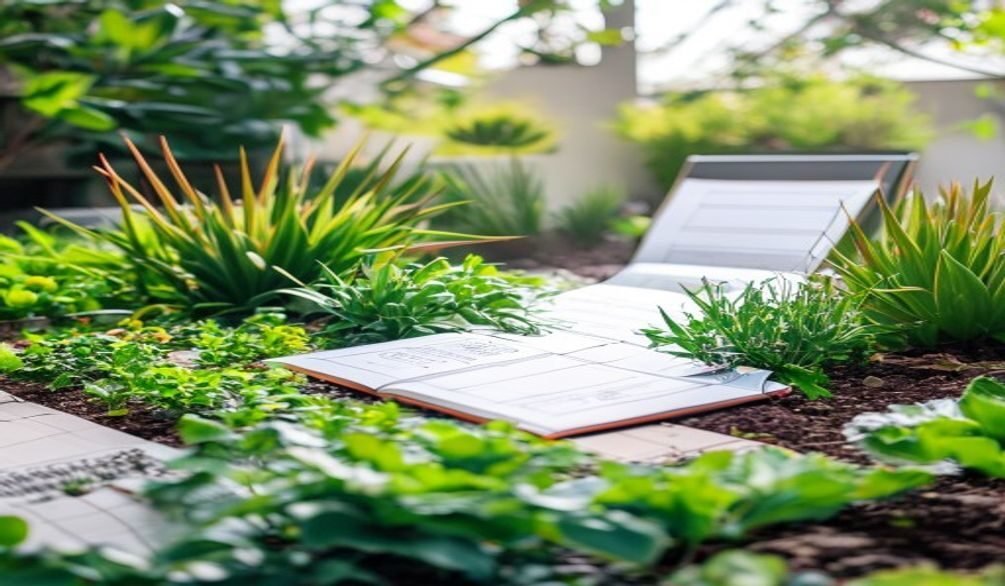
Certain vegetables, such as peppers, eggplant, onions, and leeks, benefit greatly from a longer indoor starting period, often requiring 10 weeks before the last frost date. This extended time allows them to develop strong root systems and substantial foliage before transplanting. In contrast, tomatoes, broccoli, cabbage, and parsley typically need about 8 weeks indoors. The Old Farmer’s Almanac provides comprehensive planting guides that detail these specific timelines, which are invaluable for planning your **Indoor Seed Starting for Vegetables** schedule.
Here’s a breakdown of common vegetables and their specific indoor starting requirements:
- Tomatoes: Start 6-8 weeks before last frost. Optimal germination temperature is 75-85°F (24-29°C). They need strong grow lights for seed starting to prevent legginess.
- Peppers & Eggplant: Start 8-10 weeks before last frost. These are heat-lovers, requiring consistent soil temperatures of 80-85°F (27-29°C) for best germination, making heat mats for germination almost essential.
- Broccoli & Cabbage: Start 6-8 weeks before last frost. They prefer cooler germination temperatures, around 65-70°F (18-21°C), and can tolerate slightly less intense light initially.
- Onions & Leeks: Start 10-12 weeks before last frost. Sow thickly and trim tops to encourage root development. They are slow growers and benefit from an early start.
- Kale & Lettuce: Start 4-6 weeks before last frost. These cool-season crops prefer cooler soil temperatures for germination, around 60-70°F (15-21°C).
Understanding these vegetable specific needs is crucial for effective **Indoor Seed Starting for Vegetables**.
Hardening off & transplanting your seedlings
The transition from a controlled indoor environment to the unpredictable outdoors is one of the most critical stages for your seedlings, requiring a process called hardening off seedlings. This gradual acclimatization is essential to prevent shock and ensure your young plants thrive in their new home. Without proper hardening off, even the strongest indoor-started plants can suffer significant setbacks or even die.
Hardening off seedlings should begin about 7-14 days before your planned transplant date, depending on the plant and weather conditions. Start by placing seedlings outdoors in a protected, shady location for a few hours on the first day. Over the next week or two, gradually increase their exposure to sunlight, wind, and cooler temperatures. Bring them indoors if there’s a risk of frost or extreme weather. This slow introduction to outdoor elements toughens cell walls and prepares them for the rigors of the garden.
Once hardened off, your vegetable seedling care shifts to successful transplanting. Dig holes large enough to accommodate the root ball, and if using biodegradable pots, plant them directly. For plastic trays, gently remove seedlings, being careful not to damage roots. Plant at the appropriate depth; tomatoes, for instance, can be planted deeper to encourage more root growth, while others should be planted at the same depth they were in the tray. Water thoroughly after transplanting to help settle the soil and reduce stress. This careful transition from **Indoor Seed Starting for Vegetables** to the garden ensures your efforts pay off.
Budget-friendly vs. premium seed starting setups
When it comes to **Indoor Seed Starting for Vegetables**, gardeners have a wide spectrum of options, from highly economical DIY solutions to sophisticated premium setups. Your choice often depends on your budget, gardening goals, and the scale of your indoor seed starting. Both approaches can yield successful results if executed correctly.
A budget-friendly setup for **Indoor Seed Starting for Vegetables** often involves repurposing household items. For instance, many gardeners use recycled plastic containers, such as yogurt cups or milk jugs, for DIY seed starting containers. Instead of expensive grow lights for seed starting, some opt for basic fluorescent shop lights, which are more affordable though less efficient than dedicated LEDs. Similarly, natural sunlight supplemented by rotating trays can be a low-cost alternative to heat mats for germination, though results may vary. This approach is ideal for beginners or those starting a small number of plants.
On the other hand, a premium **Indoor Seed Starting for Vegetables** setup offers convenience, efficiency, and often higher success rates. This might include:
- High-Quality Grow Lights: Energy-efficient LED grow lights, like those from VIVOSUN, provide optimal light spectrum and intensity.
- Automated Watering Systems: Self-watering seed starter kits, such as the Gardener’s Supply Grow Ease Seed Starter Kit, reduce daily maintenance.
- Thermostatically Controlled Heat Mats: These ensure precise soil temperatures for germination.
- Specialized Seed Starting Trays: Brands like Sili-Seedlings offer reusable, flexible silicone trays for easy seedling removal.
- Humidity Domes and Ventilation: Integrated systems for optimal moisture and airflow control.
While the initial investment is higher, premium setups often save time and lead to stronger, more consistent seedling growth, making them a worthwhile consideration for dedicated gardeners.
What vegetables not to start indoors?
While **Indoor Seed Starting for Vegetables** is beneficial for many crops, some vegetables are best direct-sown into the garden. These plants typically dislike root disturbance or grow so quickly that an indoor head start isn’t necessary. Peter Nitzsche and Steve Reiners of Rutgers NJAES explain that “The easiest way to start any vegetable garden is direct seeding—wait until the weather warms and plant the seeds directly in the garden. Unfortunately, direct seeding is not practical for some crops,” implying that for others, it is indeed the best method.
Vegetables with taproots, such as carrots, radishes, and parsnips, are particularly sensitive to transplanting. Disturbing their main root can lead to stunted growth or malformed vegetables, making **Indoor Seed Starting for Vegetables** counterproductive for them. Similarly, large-seeded crops like beans, peas, and corn germinate and grow very quickly, so starting them indoors offers little advantage and can lead to leggy, weak plants if not transplanted promptly.
Here’s a list of common vegetables generally not recommended for indoor starting:
- Carrots: Develop long taproots that resent disturbance.
- Radishes: Grow very quickly and are sensitive to transplanting.
- Beets: Another root crop that prefers direct sowing.
- Beans (Bush & Pole): Fast-growing and dislike root disruption.
- Peas: Similar to beans, they grow quickly and are best direct-sown.
- Corn: Rapid growth and sensitivity to transplant shock make it unsuitable for **Indoor Seed Starting for Vegetables**.
- Spinach: Grows quickly and can bolt (go to seed) if started too early indoors.
- Squash, Cucumbers, Melons: These vining plants grow rapidly and are best direct-sown once soil temperatures are warm enough, though some gardeners briefly start them indoors in peat pots to minimize root disturbance.
For these crops, waiting for the appropriate outdoor temperatures and sowing directly into your garden beds will generally yield the healthiest plants.
Frequently asked questions
What are the 7 steps to starting seeds indoors?
The 7 steps to starting seeds indoors are: gathering supplies, preparing the seed starting mix, sowing seeds correctly, providing optimal light, managing temperature and humidity, watering and fertilizing seedlings, and hardening off before transplanting. These steps ensure a structured approach to successful **Indoor Seed Starting for Vegetables**.
What is the best way to start vegetable seeds indoors?
The best way to start vegetable seeds indoors involves providing adequate light with grow lights for seed starting, maintaining consistent warmth with heat mats for germination, using a sterile seed starting mix, ensuring proper drainage, and gradually hardening off seedlings. This comprehensive approach maximizes germination and seedling vigor, leading to healthier plants.
What are the disadvantages of starting seeds indoors?
The disadvantages of starting seeds indoors include the initial cost of equipment like grow lights and heat mats, the time commitment for daily care, and the risk of common issues like leggy seedlings or damping off. However, the benefits, such as extending the growing season and saving money (average 757% ROI in 2021), often outweigh these drawbacks.
What vegetables should not be started indoors?
Vegetables that should not be started indoors are typically those with delicate taproots or those that grow very quickly, as they dislike root disturbance. Examples include carrots, radishes, beans, peas, corn, and spinach, as noted by experts from Rutgers NJAES. Direct sowing these seeds into the garden once conditions are right is usually more successful.
How do i prevent leggy seedlings when starting seeds indoors?
To prevent leggy seedlings during **Indoor Seed Starting for Vegetables**, ensure your grow lights for seed starting are positioned very close to the seedlings (2-4 inches above). Providing 14-16 hours of intense, full-spectrum light daily is crucial to encourage compact, strong growth. Good air circulation from a small fan also helps strengthen stems.
Mastering **Indoor Seed Starting for Vegetables** is a truly empowering skill for any gardener, allowing you to cultivate robust plants, extend your growing season, and enjoy a greater variety of fresh produce. By diligently following these essential tips—from selecting the right supplies to understanding specific vegetable needs and the crucial hardening off process—you’re setting your garden up for success. I’m Gaurav, and with my 10+ years in gardening, I’ve seen firsthand how these practices transform a simple seed into a thriving harvest. Embrace the journey of **Indoor Seed Starting for Vegetables**, and watch your gardening dreams flourish!