Ever wondered if you could save seeds from your most successful garden plants, ensuring a bountiful harvest year after year without buying new packets? This basic garden seed saving guide will walk you through the essential steps, helping you cultivate a resilient and self-sufficient garden. You’ll discover how simple it is to preserve your favorite varieties, reduce gardening costs, and foster a deeper connection with your plants.
Why Embrace Basic Garden Seed Saving?
Embracing seed saving offers a profound connection to your garden and significant practical benefits. For many, it’s about more than just saving money; it’s about cultivating a more resilient and sustainable lifestyle. In fact, roughly one in four home gardeners in the U.S. saved seeds in 2024-2026, a testament to its growing popularity.
Saving your own seeds allows you to adapt plants to your specific local conditions over time. You select for traits like drought tolerance, disease resistance, or exceptional flavor, creating varieties perfectly suited to your microclimate. As RHS Chief Horticulturist Guy Barter noted in 2025, gardening is increasingly about “purpose,” and seed saving perfectly embodies this shift towards a greener future. It’s a fundamental step toward maximizing organic garden yields and ensuring future harvests.
What Are the Easiest Seeds to Save for Beginners?
Starting your seed-saving journey with easy-to-save varieties builds confidence and ensures success. The key here is to focus on open-pollinated plants, which include most heirloom seeds. These varieties produce seeds that will grow into plants identical to the parent, unlike hybrid seeds.
For those wondering how to save vegetable seeds for beginners, here are some top picks that make an excellent heirloom seed saving guide:
- Lettuce: Let a few plants bolt (go to seed) at the end of the season. The small seeds are easy to collect once dry.
- Beans and Peas: Allow pods to dry completely on the plant until they rattle. Shell them to reveal the seeds. ‘Kentucky Wonder (Bush)’ beans are a great example.
- Tomatoes: ‘Amish Paste’ and ‘Cherokee Purple’ are fantastic heirloom choices. These require a simple fermentation process to clean.
- Peppers: Both hot and sweet peppers are straightforward. Allow the fruit to fully ripen and begin to dry on the plant, then simply extract and dry the seeds.
- Calendula and Nigella: Many annual flowers are also incredibly easy to save, often just requiring you to collect their dry seed heads.
These plants minimize the risk of unwanted cross-pollination, making them ideal for ensuring your saved seeds produce predictable results. This focus on `easiest seeds to save` ensures a positive initial experience.
What Seeds Should You Not Save from Your Garden?
While the idea of saving seeds from every plant is appealing, some seeds are best left un-saved, especially for beginners. The most critical distinction lies with hybrid seeds, often labeled F1 on seed packets. You should not save these from your garden.
Here’s the thing about hybrids: they are the result of crossing two distinct parent plants to achieve specific desirable traits, like increased yield or disease resistance. However, if you save seeds from a hybrid plant, the offspring (known as F2 generation) will not be true to the parent. You’ll likely get a mix of traits from the original grandparents, leading to unpredictable and often undesirable results. This genetic variability is due to the nature of their creation, making them unsuitable for consistent seed saving.
Additionally, be mindful of plants that readily cross-pollinate, especially if you grow multiple varieties of the same species close together. For instance, if you’re growing several types of squash, their pollen might mix, leading to unexpected fruit in the next generation. While some gardeners enjoy these surprises, for consistent results, stick to varieties that are less prone to cross-pollination or ensure adequate isolation distances.
Step-by-Step: A Basic Garden Seed Saving Guide for Collection & Cleaning
Successfully saving seeds hinges on proper collection and thorough cleaning. This fundamental process ensures your seeds are viable and ready for storage. Knowing when and how to harvest vegetables for peak flavor is a great start, but for seeds, you need to wait even longer, allowing the plant to fully mature its reproductive parts.
Harvesting Your Seeds
The exact timing depends on the plant, but the general rule is to let the fruit or seed pod mature fully on the plant, often beyond the point you’d harvest for eating.
- Allow Full Maturation: For vegetables like tomatoes, peppers, or squash, let the fruit ripen past its eating stage, often until it’s soft or even slightly overripe. For beans, peas, or lettuce, let the pods or seed heads dry completely on the plant until they are brittle and brown.
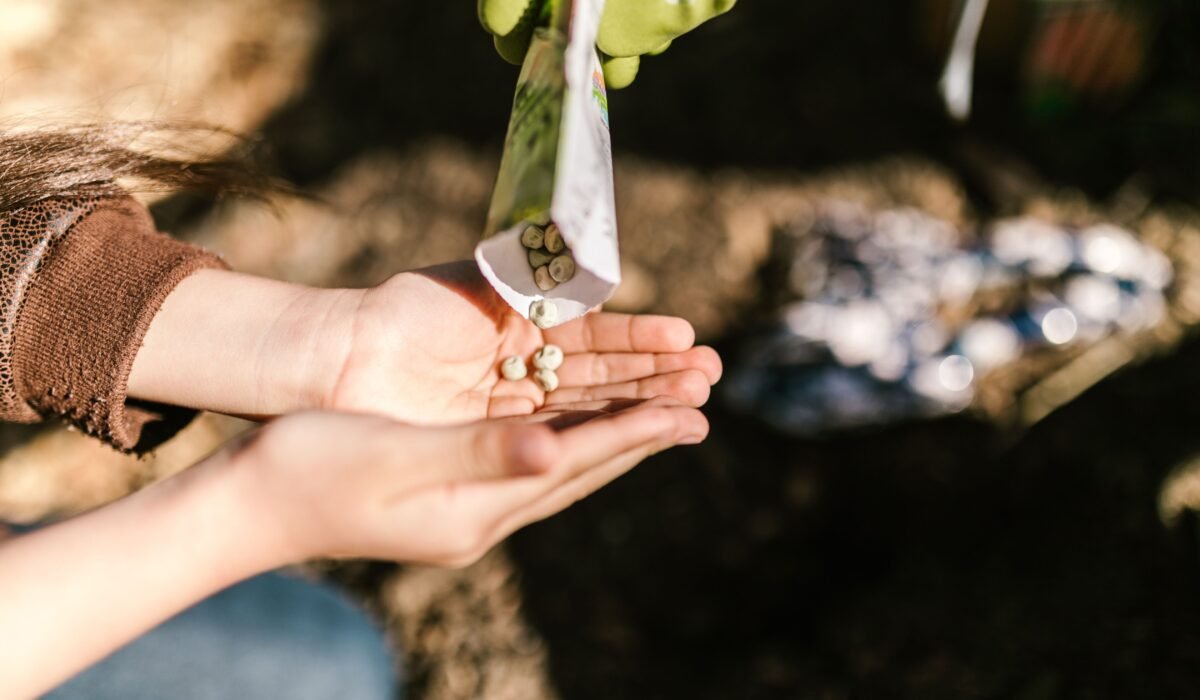
- Collect Carefully: Gently remove the mature seed-bearing parts. For dry seeds (like beans, peas, or sunflowers), snip off the dry pods or heads. For wet seeds (like tomatoes or cucumbers), simply harvest the ripe fruit.
- Label Immediately: As you collect, label everything clearly with the plant type, variety, and date. This prevents confusion later, especially when dealing with different heirloom seeds.
Basic Seed Cleaning & Drying
Proper `seed cleaning` removes unwanted plant material and prevents mold, while `seed drying` is crucial for long-term viability.
- Dry Seeds (e.g., Beans, Peas, Lettuce, Peppers):
- Shell dry pods or separate seeds from chaff.
- Spread seeds in a single layer on a screen or newspaper in a well-ventilated, dry area away from direct sunlight.
- Turn them daily for 1-3 weeks until they are completely dry and hard. They should snap, not bend.
- Wet Seeds (e.g., Tomatoes, Cucumbers, Melons):
- Scoop seeds and pulp into a jar with a little water.
- Allow to ferment for 2-5 days, stirring daily. This process breaks down germination inhibitors and separates good seeds (which sink) from bad ones and pulp (which float).
- Pour off the moldy top layer, rinse the good seeds thoroughly, and then spread them on a non-stick surface (like a ceramic plate or parchment paper) to dry.
- Ensure they are completely dry, which can take 1-2 weeks, before storing.
Insufficient drying is one of the most common mistakes beginners make, leading to poor `germination rates` later on.
How Do You Store Seeds After Collecting for Optimal Viability?
Once your seeds are thoroughly cleaned and dried, proper `seed storage` is paramount to maintaining their vitality. The goal is to keep them cool, dark, and dry. This environment slows down the metabolic processes within the seed, preserving its energy reserves and significantly extending its shelf life.
Consider these key factors for optimal viability:
- Cool Temperatures: Ideally, store seeds in a consistently cool place, such as a closet, basement, or even a refrigerator. Temperatures between 35-50°F (2-10°C) are excellent.
- Low Humidity: Moisture is the enemy of stored seeds. Aim for a relative humidity below 50%. If you live in a humid climate, consider adding a desiccant packet (like silica gel) to your storage containers.
- Darkness: Light can degrade seeds over time, so store them in opaque containers or in a dark location.
- Airtight Containers: Once dried, seeds should be stored in airtight containers to prevent reabsorption of moisture. Glass jars with tight-fitting lids, metal tins (like a Fordhook Seed Tin), or even sealed plastic bins work well.
Before placing them into airtight containers, always ensure seeds are bone-dry. Many gardeners use small seed envelopes or packets inside larger containers for organization, clearly labeling each with the variety and date. Organizations like Seed Savers Exchange offer specialized eco-friendly seed-saving kits designed for optimal preservation, helping you maintain high `germination rates` for years to come.
Beyond the Basics: Saving Seeds for Climate Resilience
Moving beyond simply preserving your favorite plants, seed saving offers a powerful tool for developing varieties adapted to changing environmental conditions. This is where `seed saving for climate change` becomes a tangible act of resilience. By consistently saving seeds from your strongest plants year after year, you are inadvertently selecting for traits that thrive in your specific garden’s microclimate.
What most people miss is how this simple act contributes to a more robust food system. If you consistently save seeds from tomatoes that tolerated a drought or beans that resisted a new pest, you are slowly but surely breeding more resilient strains. This process strengthens genetic diversity within your garden, making it less vulnerable to extreme weather events or emerging diseases. Henry David Thoreau’s observation, “Though I do not believe that a plant will spring up where no seed has been, I have great faith in a seed. Convince me that you have a seed there, and I am prepared to expect wonders,” perfectly captures this potential. The growing interest is evident; California extension data shows that attendance at seed-saving workshops rose from 1,100 in 2019 to 4,200 in 2023, with 29% of attendees adopting regular practices. This proactive approach to selecting for traits like heat tolerance or early maturity is key to building a truly resilient garden.
The Broader Impact: Seed Saving for Community & Food Security
The act of saving seeds extends far beyond your backyard, fostering community connections and strengthening local food security. When you save seeds, you’re not just preserving plants; you’re preserving biodiversity and cultural heritage. This collective effort is gaining traction, with a 2024 audit of community seed libraries across 12 U.S. states reporting 38% of active participants saving seeds at least once annually.
These efforts contribute significantly to local food systems. Sharing `heirloom seeds` through `community seed libraries` or seed swaps allows gardeners to access unique, locally adapted varieties that might not be available commercially. This decentralized approach to seed preservation ensures that valuable genetics are maintained and shared, creating a network of resilient gardens. As physicist and activist Vandana Shiva eloquently states, “That is why the act of seed saving is such an important political act in this time… organizing yourself to save the seeds, have a community garden, create an exchange, do everything that it takes to protect and rejuvenate the seed.” By participating in these local initiatives, you directly contribute to a more secure and sustainable food future for everyone. You are literally planting the seeds for a stronger community.
Frequently Asked Questions
What are the 4 main types of seed saving?
For beginners, seed saving methods are primarily categorized into two main approaches: **dry seed saving** and **wet seed saving**. Dry seed saving involves collecting seeds from plants like beans, peas, or lettuce after they have fully dried on the plant. Wet seed saving, used for fleshy fruits like tomatoes or cucumbers, often involves a fermentation process to clean the seeds before drying.
What is the easiest seed to save?
The easiest seeds to save for beginners are typically those from **open-pollinated, self-pollinating plants** like lettuce, beans, peas, and many varieties of tomatoes and peppers. These plants generally don’t cross-pollinate easily with other varieties, ensuring the saved seeds will grow true to the parent plant without complex isolation techniques.
What seeds should you not save?
You should generally **not save seeds from hybrid (F1) plants**. These seeds will not produce plants identical to the parent; instead, their offspring will likely exhibit a mix of traits from the original parent lines, leading to unpredictable and often less desirable results. It’s best to purchase new hybrid seeds each season if you want to grow specific hybrid varieties.
How do you store seeds after collecting?
After thoroughly cleaning and drying your collected seeds, you should store them in a **cool, dark, and dry environment** to maintain optimal viability. Airtight containers like glass jars or metal tins, kept in a refrigerator, freezer, or a cool basement, are ideal. Proper storage protects seeds from moisture, light, and fluctuating temperatures, which can reduce their `germination rates`.
Learning the basics of garden seed saving empowers you to become a more resilient and self-sufficient gardener. By understanding which seeds to save, how to collect and clean them, and the best ways to store them, you’re investing in the future of your garden and contributing to broader food security. Start with a few easy varieties this season, and watch your garden’s potential grow.