Key Takeaways
- Over 43% of American households now grow food at home, according to Cooped Up Life (2026).
- Starting seeds indoors allows gardeners to get a significant head start on the growing season, as noted by Elm Dirt (2025).
- The COVID-19 pandemic led to 18.3 million new gardeners, many of whom are millennials, as reported by Cooped Up Life (2026).
- Maintaining a consistent temperature between 70-75°F (21-24°C) is crucial for germination, often achieved with a VIVOHOME Seedling Heat Mat.
- Tomatoes are the most popular U.S. vegetable, with 86% of gardeners growing them, often started indoors due to long growth requirements, states Cooped Up Life (2026).
Starting seeds indoors can feel daunting, but mastering the art of **beginner seed starting indoors** unlocks a world of gardening possibilities, from unique heirloom varieties to significant cost savings. Many aspiring gardeners struggle with knowing where to begin, often facing issues like leggy seedlings or poor germination, which can quickly dampen enthusiasm. This comprehensive guide will equip you with seven essential tips, drawing on my 10+ years of gardening expertise, to ensure your journey into indoor seed starting is not just successful, but genuinely rewarding.
Quick Answer: Starting seeds indoors gives beginners a head start on the growing season, offers access to a wider variety of plants, and can save money. Essential tips include using quality seeds and seed-starting mix, providing adequate light and warmth, maintaining consistent moisture, and hardening off seedlings before transplanting outdoors.
Why Start Seeds Indoors: The Beginner’s Advantage
Starting seeds indoors offers significant advantages for any gardener, especially those just beginning their journey, by extending the growing season and providing greater plant selection. “Starting seeds indoors means you get a massive head start on the season,” states Elm Dirt (2025), emphasizing how this practice leads to stronger plants and larger harvests. This early start is particularly beneficial for plants that require a long growing period before the last frost.
Beyond the head start, **beginner seed starting indoors** allows access to a diverse array of plant varieties often unavailable at local nurseries. You can explore unique heirloom vegetables and flowers from suppliers like Baker Creek Heirloom Seeds, expanding your garden’s biodiversity. This control over plant selection means you’re not limited to what’s in stock, giving you the freedom to cultivate truly distinctive plants.
Starting your own seeds also presents a substantial cost-saving opportunity compared to purchasing established seedlings. Over 43% of American households now grow food at home, and many utilize indoor seed starting as a top tactic to combat rising costs, according to Cooped Up Life (2026). This approach makes gardening more accessible and sustainable for everyone.
“Vigorous plants started indoors flower sooner and produce an earlier harvest than plants started outdoors,” explains David Trinklein, Horticulture Extension State Specialist, Division of Plant Sciences and Technology, MU Extension.
Furthermore, **beginner seed starting indoors** allows for better control over the growing environment from day one. You can ensure your seedlings are grown without harsh pesticides or chemicals, which is crucial for organic indoor seed starting. This careful cultivation contributes to healthier, more robust plants that are better equipped to thrive once transplanted outdoors.
Essential Supplies for Beginner Seed Starting Indoors
To embark on successful **beginner seed starting indoors**, gathering the correct essential supplies is the first critical step, ensuring your seedlings have the best possible start. The right equipment creates an optimal environment for germination and early growth, significantly increasing your chances of success. Without these foundational tools, even the best seeds can struggle to thrive.
Here’s a breakdown of the key items you’ll need for your indoor seed starting setup:
- Seed Starting Trays: Look for trays with drainage holes and clear domes, like the Burpee Seed Starter Tray, which creates a mini-greenhouse effect. These trays provide individual cells for each seedling, preventing root entanglement and making transplanting easier.
- Seed Starting Mix: This specialized soilless mix is lighter and finer than potting soil, offering excellent drainage and aeration crucial for delicate seedlings. Many articles recommend a quality soilless seed starting mix for optimal results.
- Seeds: Choose high-quality seeds from reputable companies like Johnny’s Selected Seeds or Baker Creek Heirloom Seeds. Fresh seeds have higher germination rates, leading to more successful plants.
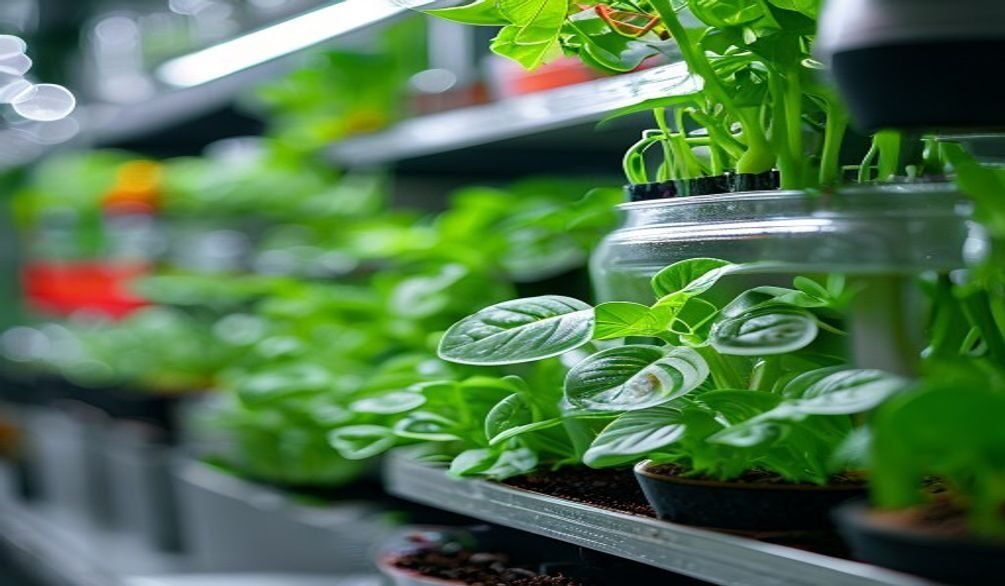
- Grow Lights: Adequate light is paramount for strong, compact seedlings. LED grow lights or standard fluorescent shop lights are excellent choices for indoor seed starting, preventing leggy seedlings.
- Heat Mat: A seedling heat mat, such as the VIVOHOME Seedling Heat Mat, provides bottom warmth, which is vital for quick and uniform germination for many plant varieties. Maintaining consistent soil temperatures is key.
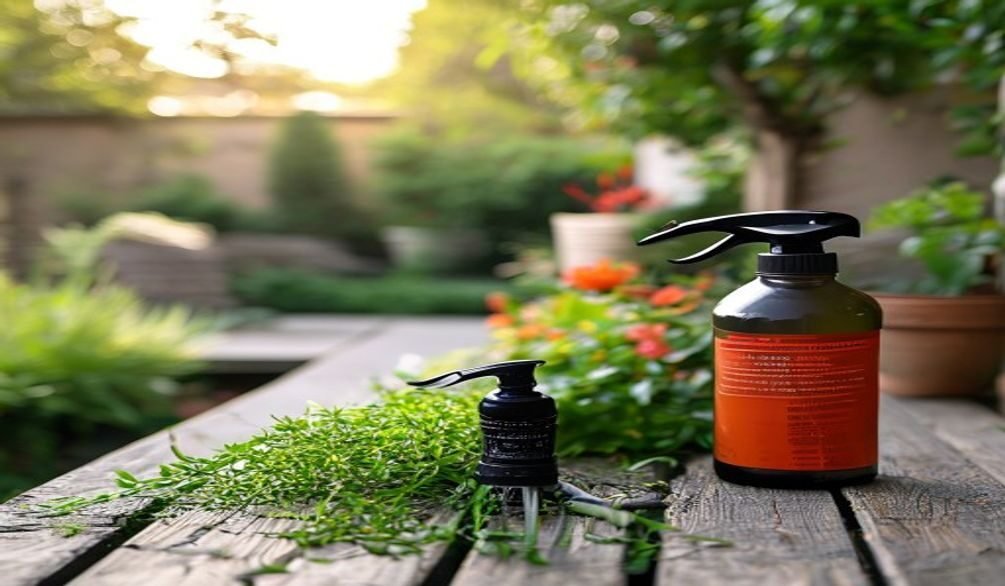
- Watering Can or Spray Bottle: A gentle watering method is essential to avoid disturbing delicate seeds and seedlings. A fine spray bottle or a small watering can with a gentle rose attachment works best.
- Labels and Markers: Keep track of what you’ve planted and when. Clear labeling prevents confusion and helps you monitor germination times.
Choosing a quality seed starting mix over garden soil is crucial because it is sterile, preventing diseases like damping off, and provides the fine texture tiny roots need to establish.
Investing in these proper supplies for **beginner seed starting indoors** establishes a solid foundation for healthy plant development. While some items can be substituted with DIY solutions, having dedicated seed starting essentials will streamline the process and boost your confidence.
| Supply Category | Recommended Product/Type | Key Benefit for Beginners |
|---|---|---|
| Seed Trays | Burpee Seed Starter Tray | Individual cells and humidity dome for optimal growth. |
| Growing Medium | Soilless Seed Starting Mix | Sterile, fine texture, excellent drainage for tender roots. |
| Light Source | LED Grow Lights | Energy-efficient, full-spectrum light prevents legginess. |
| Heat Source | VIVOHOME Seedling Heat Mat | Consistent bottom heat promotes faster, even germination. |
| Seeds | Johnny’s Selected Seeds, Baker Creek Heirloom Seeds | High germination rates, wide variety of reliable options. |
When to Start Seeds Indoors for Your Garden
Determining when to start seeds indoors for your garden is crucial for success, as timing directly impacts whether your seedlings are ready for transplanting at the optimal moment. The general rule of thumb is to count backward from your area’s average last spring frost date, ensuring plants have sufficient time to develop but don’t become root-bound indoors. This precise timing is a cornerstone of effective **beginner seed starting indoors**.
“The right time to start your seeds indoors varies significantly by crop and location, ranging anywhere from 2–16 weeks prior to transplanting,” advises Johnny’s Selected Seeds. This variation highlights the importance of consulting seed packets and local extension offices for specific guidance. Most gardeners start seeds 6-8 weeks before the last expected frost date in their area, according to Elm Dirt (2025).
To pinpoint your ideal indoor seed starting times, you’ll need to know your average last frost date. Many online resources and local university extensions offer this information specific to your zip code. Once you have this date, cross-reference it with the “days to transplant” or “start indoors” recommendations on your seed packets. This will create your personalized when to start seeds indoors chart.
Cold stratification seeds, which require a period of cold and moist conditions to break dormancy, must be started even earlier to allow for this essential pre-treatment phase.
For example, popular vegetables like tomatoes and peppers typically need 6-8 weeks indoors, while faster-growing plants like lettuce might only need 3-4 weeks. Tomatoes are the most popular vegetable in the U.S., with 86% of gardeners growing them, and many likely start them indoors due to their 6-8 week indoor growth requirement before transplanting, states Cooped Up Life (2026). Planning ahead ensures your seedlings are robust and ready for their outdoor debut, making your **beginner seed starting indoors** efforts worthwhile.
Step-by-Step Guide to Successful Indoor Seed Starting
Achieving successful **beginner seed starting indoors** involves a series of methodical steps, each designed to provide the best environment for your young plants to thrive. Following this guide will simplify the process, transforming tiny seeds into robust seedlings ready for your garden. My experience has shown that attention to detail at each stage makes all the difference.
Step 1: Gather Essential Supplies
Before you begin, assemble all necessary materials. This includes your chosen seeds, a quality seed starting mix, trays with drainage, grow lights, and a heat mat if needed. Having everything organized beforehand makes the planting process smooth and enjoyable.
Step 2: Prepare Seed Starting Mix & Trays
Moisten your seed starting mix thoroughly until it’s damp but not soggy, like a wrung-out sponge. Fill your Burpee Seed Starter Tray cells to the top, gently tamping down the mix to remove large air pockets. This ensures consistent moisture and good seed-to-soil contact.
Step 3: Plant Your Seeds Correctly
Follow the planting depth instructions on your seed packets; a common rule is to plant seeds at a depth equal to two or three times their diameter. Place one or two seeds per cell to allow for optimal growth, then lightly cover them with the moistened seed starting mix. Proper planting depth is crucial for successful germination.
Step 4: Provide Optimal Light & Warmth
After planting, place your seed trays on a VIVOHOME Seedling Heat Mat to maintain consistent soil temperatures, typically between 70-75°F (21-24°C), which encourages germination. Once sprouts emerge, immediately position your grow lights just a few inches above the seedlings (around 2-4 inches), providing 14-16 hours of light daily to prevent leggy seedlings. This consistent light is vital for strong, compact growth in your indoor seed starting setup.
Step 5: Maintain Consistent Moisture & Nutrition
Keep the seed starting mix consistently moist but never waterlogged. Use a spray bottle or bottom-water your trays to avoid disturbing delicate seedlings. Once seedlings develop their first true leaves, you can begin feeding them with a diluted liquid organic fertilizer, supporting their rapid growth.
Step 6: Harden Off Seedlings Gradually
Before transplanting outdoors, seedlings need a period of “hardening off” to acclimatize to outdoor conditions. This involves gradually exposing them to increasing periods of sunlight, wind, and cooler temperatures over 7-14 days. This crucial step prevents transplant shock, making your **beginner seed starting indoors** efforts pay off.
Step 7: Successfully Transplant Outdoors
Once hardened off and all danger of frost has passed, transplant your seedlings into your garden beds or containers. Dig a hole large enough to accommodate the root ball, gently place the seedling, and backfill with soil. Water thoroughly after transplanting to help the roots settle. For more detailed guidance, refer to our article on Transplanting Seedlings Successfully.
Common Problems & Troubleshooting for Seedlings
Even with careful **beginner seed starting indoors**, you might encounter common seedling problems; knowing how to troubleshoot them effectively is key to saving your young plants. Identifying the issue early and applying the correct solution can turn a struggling seedling into a thriving one. From my experience, most issues stem from environmental factors.
One prevalent issue is **leggy seedlings**, characterized by tall, thin stems reaching for light. This almost always indicates insufficient light. The solution is to move your grow lights closer to the seedlings (2-4 inches above) and ensure they receive 14-16 hours of light daily. Increasing light intensity and duration is vital for troubleshooting leggy seedlings.
Another common problem is “damping off,” a fungal disease that causes seedlings to collapse at the soil line, often due to overly wet conditions and poor air circulation.
To prevent damping off, ensure your seed starting mix is sterile, avoid overwatering, and provide good air circulation by using a small fan. Using a clean Burpee Seed Starter Tray and allowing the top layer of soil to dry slightly between waterings also helps. Lack of germination can be frustrating. This might be due to old seeds, incorrect planting depth, or insufficient warmth. Always check seed viability, ensure proper planting, and use a VIVOHOME Seedling Heat Mat for warmth.
If seedlings turn yellow, it could be a sign of nutrient deficiency or overwatering. Assess your watering schedule and consider a diluted liquid fertilizer if the problem persists after correcting moisture levels. Your efforts in **beginner seed starting indoors** will be more successful if you’re prepared to address these common challenges proactively.
Budget-Friendly & DIY Seed Starting Solutions
For those exploring **beginner seed starting indoors** on a budget, numerous creative and DIY solutions can replace expensive equipment without compromising seedling health. You don’t need a professional setup to achieve excellent results; often, repurposed household items work just as well. This approach makes indoor seed starting accessible to everyone.
Instead of purchasing specialized seed starting trays, consider repurposing items like plastic take-out containers, milk jugs cut in half, or even egg cartons. Just ensure these DIY seed starting containers have drainage holes poked in the bottom to prevent waterlogging. My personal garden has seen many successful starts in upcycled containers.
You can create your own seed starting mix by combining equal parts peat moss (or coco coir), perlite, and vermiculite, offering a cost-effective alternative to store-bought mixes.
For grow lights, while dedicated LED grow lights are ideal, a standard fluorescent shop light with cool white bulbs can be a very effective and inexpensive alternative. Position it just a few inches above your seedlings for optimal light. A simple seedling heat mat can be simulated by placing trays on top of a refrigerator or another warm appliance, though temperature consistency may vary. This organic indoor seed starting approach prioritizes sustainability and affordability.
Even without a fancy setup, successful **beginner seed starting indoors** is entirely achievable with a bit of ingenuity. These budget-friendly options prove that gardening doesn’t have to be an expensive hobby, allowing more people to enjoy the satisfaction of growing their own plants from scratch.
Hardening Off and Transplanting Your Seedlings
The final, crucial stages of **beginner seed starting indoors** involve hardening off your seedlings and successfully transplanting them, preparing them for the rigors of the outdoor environment. This transition period is vital; skipping or rushing it can lead to stunted growth or even death of your young plants. Hardening off is about gradual acclimatization, not abrupt exposure.
Hardening off is the process of gradually introducing indoor-grown seedlings to outdoor conditions like direct sunlight, wind, and fluctuating temperatures. Without this step, tender seedlings can suffer severe transplant shock, characterized by wilting, scorched leaves, or a complete halt in growth. David Trinklein, Horticulture Extension State Specialist, emphasizes the importance of allowing plants to adapt slowly.
Here’s a typical hardening off seedlings schedule:
- Day 1-3: Place seedlings in a shaded, protected spot outdoors for 2-3 hours. Bring them indoors at night.
- Day 4-6: Increase outdoor exposure to 4-6 hours, moving them to a slightly brighter, but still indirect, light location. Continue to bring them in at night.
- Day 7-9: Extend outdoor time to 8-10 hours, including some morning sun. Ensure they are still protected from harsh winds.
- Day 10-14: Leave seedlings outdoors overnight if temperatures permit (above 50°F/10°C), gradually increasing their exposure to full sun and wind.
After the hardening off period, and once all danger of frost has passed in your area, your seedlings are ready for transplanting. Water your seedlings thoroughly a few hours before transplanting to ensure they are well-hydrated. Gently remove each seedling from its Burpee Seed Starter Tray cell, trying not to disturb the root ball. Plant them into prepared garden beds or larger containers at the same depth they were growing indoors. For more detailed steps, see our Transplanting Seedlings Successfully guide. This careful transition ensures the success of your **beginner seed starting indoors** efforts.
Frequently Asked Questions
When should I start seeds indoors for my garden?
You should generally start seeds indoors 6-8 weeks before your area’s average last spring frost date. This timing allows seedlings enough time to develop into strong, healthy plants without becoming overgrown before outdoor conditions are suitable. Consulting seed packets and local extension resources for specific plant and regional guidance is always recommended.
What do I need to start seeds indoors?
To start seeds indoors, you primarily need seeds, a sterile seed starting mix, trays with drainage, and a light source such as LED grow lights. A heat mat, like the VIVOHOME Seedling Heat Mat, is also highly recommended for optimal germination. These essential supplies create the ideal environment for healthy seedling development.
What is the best way to start seeds indoors for beginners?
The best way to start seeds indoors for beginners involves using quality seeds and a sterile seed starting mix, providing consistent warmth with a heat mat, and ensuring adequate light with grow lights. Maintain consistent moisture, avoid overwatering, and gradually harden off seedlings before transplanting to ensure successful growth. Following a step-by-step guide simplifies the entire process.
How long do you keep seeds indoors?
The duration you keep seeds indoors typically ranges from 2 to 16 weeks, depending on the plant variety and your local climate. Most gardeners keep common vegetables like tomatoes and peppers indoors for 6-8 weeks before transplanting, according to Elm Dirt (2025). Always check specific seed packet instructions for precise timing recommendations to prevent leggy or root-bound plants.
What seeds should not be started indoors?
Seeds of plants that dislike root disturbance or grow very quickly, such as carrots, radishes, beans, and corn, should typically not be started indoors. These plants are best direct-sown into the garden once the danger of frost has passed. Direct sowing minimizes transplant shock and allows these fast growers to establish themselves naturally.
Mastering **beginner seed starting indoors** is a highly rewarding gardening skill that offers immense satisfaction and tangible benefits. By following these seven essential tips—from gathering the right supplies to carefully hardening off your seedlings—you’ll set yourself up for a thriving garden and a deeper connection to your plants. Don’t be afraid to experiment, learn from each season, and enjoy the incredible journey of nurturing life from a tiny seed.