Key Takeaways
- The global microgreens market was valued at USD 3.52 billion in 2025, according to a Microgreens Market Size, Share & Growth Analysis Report (2026-2034).
- Microgreens contain 4 to 40 times more nutrients than their mature counterparts, as documented by the IMARC Group (2025).
- Indoor vertical farming constituted 44.3% of the microgreens market share in 2025, primarily due to efficient space utilization.
- Wick systems are generally considered the easiest hydroponic method for beginners due to their simplicity and minimal equipment needs.
- Hydroponic microgreens require a balanced nutrient solution for optimal growth and health, as they lack soil to provide essential minerals.
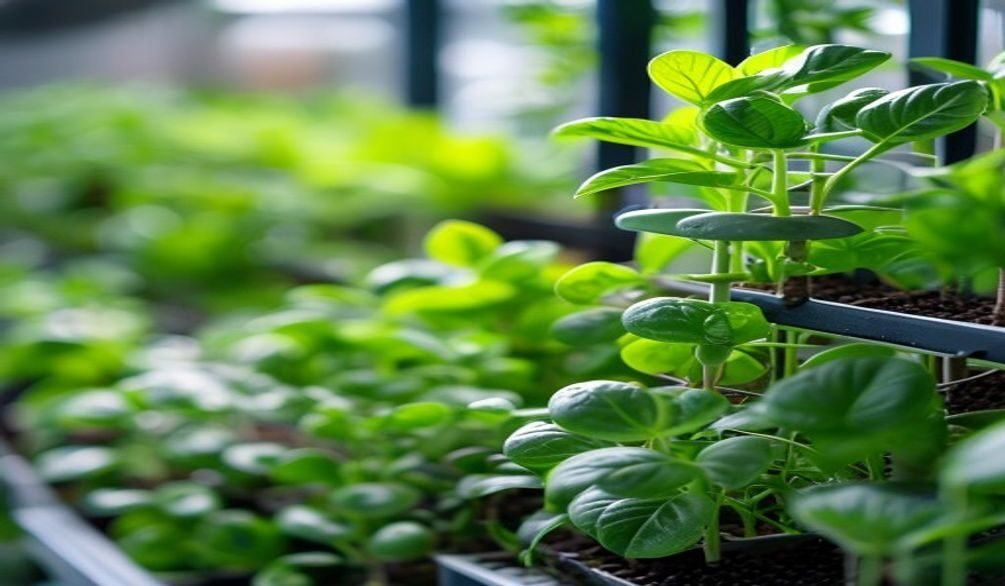
Are you ready to transform your kitchen counter into a vibrant, nutrient-dense farm? If you’re looking to **Build a Hydroponic Microgreen System**, you’re exploring one of the most efficient and rewarding ways to cultivate fresh, healthy greens right at home. In my 10+ years in horticulture, I’ve seen firsthand how soil-less growing can revolutionize your gardening efforts, offering faster harvests and cleaner produce. This guide will walk you through 7 easy ways to set up your own system, ensuring you have a continuous supply of delicious microgreens.
Quick Answer: Building a hydroponic microgreen system involves growing plants in nutrient-rich water without soil. Key methods like wick systems, deep water culture, and NFT use trays, growing media, and LED lights for faster growth and higher yields in a clean, compact environment.
Why Choose Hydroponic Microgreens?
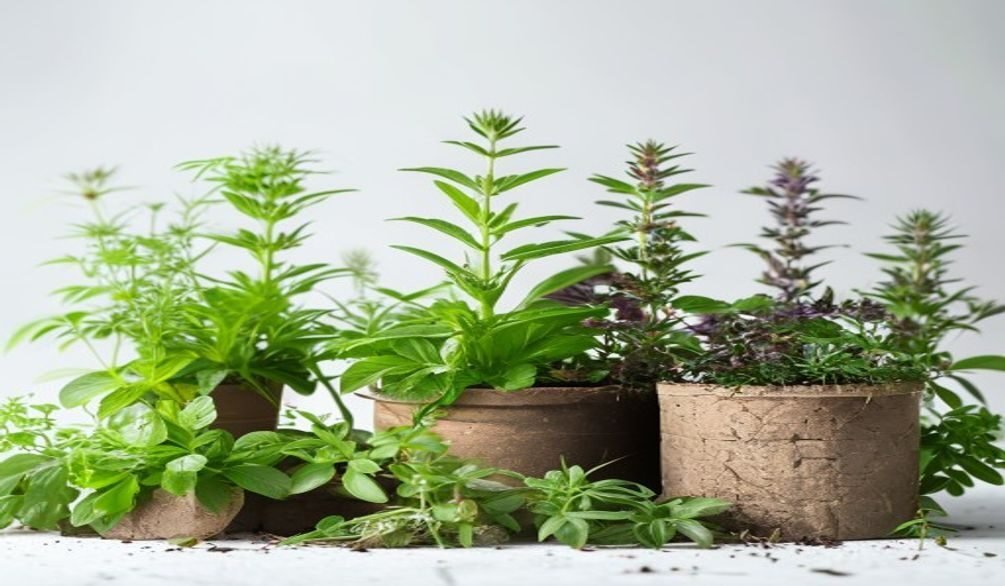
Choosing hydroponic microgreens offers significant advantages over traditional soil-based methods, primarily due to enhanced nutritional value and efficient resource use. Microgreens are documented to contain 4 to 40 times more nutrients than their mature counterparts, according to the IMARC Group (2025), making them a powerful addition to your diet.
Hydroponic growing eliminates the mess of soil, allowing for precise control over water and nutrients, which ultimately produces cleaner, healthier greens. As Vegbed aptly states, “Hydroponic growing eliminates messy soil, allows you to control water and nutrients more precisely, and produces cleaner, healthier greens.” This method is particularly appealing for urban dwellers or anyone with limited space, as it maximizes yield in compact areas.
The global microgreens market size was valued at USD 3.52 billion in 2025, according to a Microgreens Market Size, Share & Growth Analysis Report (2026-2034).
This growth underscores the increasing consumer demand for fresh, nutrient-dense produce that hydroponic systems are perfectly poised to deliver.
Indoor vertical farming, a common setup for hydroponic microgreens, held the largest market share with 44.3% in 2025, largely because of its efficient space utilization, as reported by the same Microgreens Market Size, Share & Growth Analysis Report (2026-2034). My experience confirms that vertical integration is key for maximizing output in smaller spaces. When you **Build a Hydroponic Microgreen System**, you’re investing in a future of sustainable, high-yield gardening.
Benefits of Hydroponic Microgreens
- Faster Growth Cycles: Hydroponic systems deliver nutrients directly to the roots, accelerating growth. You can harvest microgreens within 7-14 days of germination, significantly quicker than many soil crops.
- Higher Nutritional Content: As mentioned, these tiny greens are packed with vitamins, minerals, and antioxidants. Broccoli microgreens, for instance, held 24.1% of the United States microgreens market in 2025 due to their sulforaphane content, according to Mordor Intelligence (2026).
- Reduced Water Usage: Hydroponic systems can use up to 90% less water than traditional farming, as water is recirculated. AeroFarms, Inc. exemplifies this efficiency by using aeroponic sprayers to mist roots, drastically cutting water consumption.
- Pest and Disease Control: A controlled indoor environment minimizes exposure to pests and soil-borne diseases. This means fewer chemicals and healthier plants for your efforts to **Build a Hydroponic Microgreen System**.
- Year-Round Production: You’re no longer dependent on seasons or outdoor weather, allowing for consistent harvests regardless of external conditions.
7 Easy Ways to Build Your Hydroponic Microgreen System
To **Build a Hydroponic Microgreen System** that suits your needs, it’s essential to understand the various methods available, ranging from simple DIY setups to more advanced automated units. Each system has unique benefits, making it crucial to select one that aligns with your budget, space, and commitment level. In my gardening journey, I’ve found that starting simple and scaling up is often the most successful approach. For those looking for more general hydroponic builds, our guide on DIY Hydroponic Systems: 7 Simple Budget Builds offers additional insights.
Step 1: Choose Your System Type
The first step to **Build a Hydroponic Microgreen System** is selecting the right method. This choice will dictate the components you need and the complexity of your setup. Different systems offer varying levels of automation and control, impacting your initial investment and ongoing effort.
- Wick System: This passive system uses a wick to draw nutrient solution from a reservoir to the growing medium. It’s incredibly simple, budget-friendly, and requires no pumps or electricity, making it ideal for beginners who want to **Build a Hydroponic Microgreen System** without a pump.
- Deep Water Culture (DWC): Roots are suspended directly in a nutrient solution, with an air stone providing oxygen. DWC is effective for rapid growth and relatively easy to set up, though it requires an air pump.
- Nutrient Film Technique (NFT): A thin film of nutrient solution flows over the roots in a sloped channel. NFT is efficient with water and nutrients, promoting fast growth, but requires a pump and precise leveling.
- Ebb and Flow (Flood and Drain): The growing tray is periodically flooded with nutrient solution, then drained back into a reservoir. This method provides excellent oxygenation to roots and is versatile for various plant sizes.
- Drip System: Nutrient solution is delivered directly to each plant’s base via small drippers. Drip systems are highly efficient and customizable, suitable for larger setups or vertical hydroponic microgreen farms.
- Aeroponics: Roots are suspended in air and misted with a nutrient solution. This method offers superior oxygenation and extremely fast growth but is more complex and costly to implement. AeroFarms, Inc. uses a sophisticated version of this technology.
- Vertical Hydroponics: This method stacks growing layers vertically to maximize space efficiency. It can be combined with any of the above techniques, making it perfect for urban environments and commercial operations looking to **Build a Hydroponic Microgreen System** with high density.
Step 2: Gather Necessary Components
Once you’ve chosen a system, gathering the right components is crucial to successfully **Build a Hydroponic Microgreen System**. Quality materials ensure longevity and optimal plant health. Don’t skimp on essentials; reliable equipment saves headaches down the line.
- Growing Trays: Shallow trays are perfect for microgreens. Look for food-grade plastic trays, often with drainage holes for systems like ebb and flow, or solid trays for DWC.
- Reservoir: A container to hold your nutrient solution. Opaque containers prevent algae growth.
- Growing Medium: Options include coco coir, rockwool, hemp mats, or even specialized Vegbed Bamboo Grow Mats, which are praised for enhancing germination and root development.
- Nutrient Solution: Specifically formulated for hydroponics, containing all essential macro and micronutrients.
- Light Source: LED grow lights are energy-efficient and provide the necessary spectrum for rapid microgreen growth. Nova Grow Hydroponic Microgreens Kits often feature built-in LED lights.
- Air Pump and Air Stone (for DWC): To oxygenate the nutrient solution, preventing root rot.
- Water Pump (for NFT, Ebb & Flow, Drip): To circulate the nutrient solution.
- Timer: Essential for automating lights and pumps, ensuring consistent cycles.
Step 3: Prepare Growing Medium and Seeds
Proper preparation of your growing medium and seeds is a foundational step when you **Build a Hydroponic Microgreen System**. This initial care directly impacts germination rates and the overall success of your microgreen crop. A good start leads to a robust harvest.
* Hydrate Medium: If using coco coir or rockwool, pre-soak it in pH-adjusted water (around 5.5-6.5) to ensure it’s fully saturated and to rinse away any impurities.
* Seed Spreading: Evenly spread your microgreen seeds across the surface of the hydrated medium. Microgreens are typically sown densely.
* Covering (Optional): Some microgreens benefit from a light covering for 2-3 days post-seeding to encourage germination, creating a mini-greenhouse effect.
Step 4: Mix and Add Nutrient Solution
The nutrient solution is the lifeblood of your hydroponic system, so mixing it correctly is vital to successfully **Build a Hydroponic Microgreen System**. Microgreens have specific nutrient needs, and providing the right balance ensures vigorous growth. Always follow the manufacturer’s instructions for mixing ratios.
* Use Filtered Water: Start with filtered or reverse osmosis water to avoid contaminants.
* Measure Accurately: Add hydroponic nutrients according to package directions. It’s a precise science; too much or too little can harm your plants.
* Adjust pH: The ideal pH for most microgreens is between 5.5 and 6.5. Use a pH testing kit and pH up/down solutions to adjust as needed. Maintaining the correct pH is critical for nutrient absorption.
Step 5: Install Lighting and Ventilation
Effective lighting and adequate ventilation are non-negotiable elements when you **Build a Hydroponic Microgreen System**. They are crucial for photosynthesis and preventing issues like mold. Proper environmental control is key to healthy, thriving microgreens.
* Position Lights: Place LED grow lights 6-12 inches above your microgreen trays. The exact distance depends on the light’s intensity and the microgreen variety.
* Set Timer: Microgreens generally require 12-16 hours of light per day. Use a timer to automate this cycle, providing consistent illumination.
* Ensure Airflow: Gentle air circulation is essential to prevent fungal growth, especially with dense microgreen plantings. A small fan can provide adequate ventilation, reducing the risk of damping-off and mold.
Step 6: Monitor Growth and Conditions
Consistent monitoring is paramount for anyone who wants to **Build a Hydroponic Microgreen System** and keep it thriving. Regular checks allow you to catch and correct problems before they escalate. Think of yourself as a plant detective, always on the lookout for clues.
* Check Water Levels: Ensure your reservoir has sufficient nutrient solution. Top up as needed, ideally with fresh, pH-adjusted water.
* Monitor pH: Test the pH of your nutrient solution daily or every other day, adjusting to keep it in the optimal range (5.5-6.5).
* Observe Plants: Look for signs of nutrient deficiency (yellowing leaves), excess (burnt tips), or disease (mold, wilting). Early detection is vital.
* Temperature and Humidity: Maintain a consistent room temperature (65-75°F or 18-24°C) and moderate humidity to support healthy growth and prevent issues.
Step 7: Harvest Your Microgreens
The final, and most rewarding, step in your journey to **Build a Hydroponic Microgreen System** is harvesting your delicious greens. Microgreens are typically ready for harvest when they develop their first true leaves, usually 7-14 days after germination.
* Timing: Harvest when microgreens are at their peak flavor and nutritional value. This is typically when they are 2-4 inches tall and have their first set of true leaves.
* Method: Use a sharp, clean pair of scissors or a knife to cut the microgreens just above the growing medium. This allows for a clean harvest and might even enable a second flush from some varieties.
* Storage: Gently rinse your harvested microgreens and pat them dry. Store them in an airtight container in the refrigerator, where they can last for up to a week.
What is the Easiest Hydroponic Microgreen System?
The easiest hydroponic microgreen system for beginners is typically the **wick system**, due to its simplicity, low cost, and minimal equipment requirements. This passive method does not require pumps, electricity, or complex timers, making it incredibly user-friendly. A wick system uses capillary action to draw nutrient solution from a reservoir to the growing medium, providing a consistent supply of water and nutrients.
For those looking to **Build a Hydroponic Microgreen System** without a pump, the wick system is an excellent choice.
It’s essentially a self-watering setup where the growing medium absorbs water from below, mimicking how a plant draws moisture from soil but in a soilless environment.
My personal experience, and that of many beginners I’ve guided, confirms that wick systems offer a forgiving entry point into hydroponics. The Ingarden Starter Kit, for example, is an eco-friendly, self-watering hydroponic system that uses biodegradable seed pads, embodying the simplicity and effectiveness of this approach. SunBlaster Grow Light Gardens also offer automated wick-style systems, proving their commercial viability for home growers.
Do Hydroponic Microgreens Need Nutrients?
Yes, hydroponic microgreens absolutely need nutrients, as they are grown without soil and thus require a precisely formulated nutrient solution to thrive. Without soil to provide essential minerals, the entire nutritional intake of the plants must come from the water-based solution. The correct balance of macro- (nitrogen, phosphorus, potassium) and micro-nutrients (iron, manganese, zinc, etc.) is crucial for healthy growth and high yields.
Studies show that microgreens can contain 4 to 40 times more nutrients than their mature counterparts, according to the IMARC Group (2025), a benefit directly tied to optimal nutrient delivery in hydroponic systems.
Therefore, providing a complete and balanced hydroponic microgreen nutrient solution is not just beneficial, but entirely essential for success.
What most people miss is that while microgreens have a short growth cycle, they are still rapidly developing plants with high demands. Demeter Guides, author of “Hydroponics,” highlights the rapid growth, noting that “It only takes spinach about a week to go from seed to seedling,” emphasizing the need for readily available nutrition. When you **Build a Hydroponic Microgreen System**, understanding nutrient requirements is as important as the physical setup.
Key Nutrient Considerations
- Specific Formulations: Use hydroponic nutrient solutions specifically designed for leafy greens or general vegetative growth. These typically have higher nitrogen levels.
- EC/TDS Monitoring: Electrical Conductivity (EC) or Total Dissolved Solids (TDS) meters measure the concentration of nutrients in your solution. Maintaining the right EC level prevents nutrient burn or deficiency.
- pH Balance: As mentioned, pH directly impacts nutrient availability. Keep the solution between 5.5 and 6.5 for optimal uptake by microgreen roots.
- Regular Replenishment: Nutrient solution should be replaced every 7-14 days, or as per product instructions, to ensure a fresh supply and prevent nutrient imbalances.
Choosing the Best Medium for Hydroponic Microgreens
Choosing the best medium for hydroponic microgreens is critical for successful germination, root development, and overall plant health, as the medium provides physical support and moisture retention without contributing nutrients itself. The ideal growing medium for microgreens should be inert, provide good aeration, retain moisture effectively, and be easy to handle.
Vegbed Bamboo Grow Mats are highlighted as a “game-changer” for maximizing hydroponic microgreens yield due to their positive impact on germination and root development.
My 10 years of experience confirm that the right medium can significantly improve your success rates when you **Build a Hydroponic Microgreen System**.
In practice, the choice often comes down to personal preference, cost, and the specific hydroponic system being used. Different media offer varying levels of moisture retention and root support, so it’s worth experimenting to find what works best for your setup.
Popular Hydroponic Microgreen Growing Media
- Coco Coir: Derived from coconut husks, coco coir is an excellent choice for its superior water retention, good aeration, and neutral pH. It’s often used in loose form or compressed mats.
- Rockwool: Made from molten rock spun into fine fibers, rockwool offers excellent drainage and aeration. It’s sterile and pH-neutral, making it a reliable option, especially for seed starting.
- Hemp Mats: These biodegradable mats are sustainable, easy to use, and provide good root support and moisture retention. They are a popular choice for their eco-friendliness.
- Bamboo Grow Mats (e.g., Vegbed): As noted, these are highly effective for germination and root development. They are also sustainable and provide a clean growing environment.
- Perlite/Vermiculite: While often used as soil amendments, these can be incorporated into hydroponic mixes for added aeration and moisture retention, though less common as standalone microgreen media.
Cost Analysis: Building a Hydroponic Microgreen System on Any Budget
The cost to build a hydroponic microgreen system can vary widely, from under $50 for a basic DIY setup to several hundred or even thousands for an advanced, automated farm. Your budget will largely determine the complexity and scale of your system, but it’s entirely possible to start small and expand. The key insight here is that you don’t need a huge initial investment to start enjoying fresh hydroponic microgreens.
The United States microgreens market is projected to expand from USD 1.44 billion in 2025 to USD 2.69 billion by 2031, registering a CAGR of 10.67% between 2026 and 2031, according to Mordor Intelligence (2026).
This market growth demonstrates the increasing economic viability and accessibility of microgreen cultivation, including home-based hydroponic systems.
When you **Build a Hydroponic Microgreen System**, consider both initial setup costs and ongoing expenses like nutrients and seeds. A well-planned budget helps you get started without breaking the bank and allows for future upgrades.
Cost Comparison: Budget vs. Advanced Systems
| Component | Budget-Friendly Setup (Approx. Cost) | Advanced Setup (Approx. Cost) |
|---|---|---|
| Growing Trays (2-3) | $10-$20 | $30-$60 (commercial grade) |
| Reservoir | $5-$15 (plastic container) | $30-$100 (dedicated tank) |
| Growing Medium (e.g., coco coir, hemp mats) | $10-$20 (for multiple harvests) | $20-$50 (specialized mats/bulk) |
| Nutrient Solution | $15-$30 (starter bottle) | $40-$100 (concentrated, specific blends) |
| LED Grow Light | $20-$50 (basic strip light) | $80-$300+ (full spectrum, dimmable) |
| Air Pump & Stone (for DWC) | $15-$30 | $30-$60 (quieter, more powerful) |
| Water Pump & Tubing (for NFT/Drip) | N/A (for passive) / $20-$40 (basic) | $50-$150 (reliable, programmable) |
| Timer (Light/Pump) | $10-$20 (mechanical) | $30-$70 (digital, smart-enabled) |
| pH Testing Kit & Adjusters | $10-$20 (drops/strips) | $50-$150 (digital meter) |
| Total Estimated Initial Cost | $95-$235 | $360-$1040+ |
For a basic wick system, you can often get started for under $100. Commercial systems like Freight Farms’ Nursery Station, designed for large-scale microgreen production, represent a much higher investment, showcasing the scalability of hydroponic microgreen cultivation.
Troubleshooting Common Hydroponic Microgreen Problems
Even for experienced growers, common hydroponic microgreen problems can arise, but with a systematic approach to troubleshooting, most issues are easily resolved. Proactive monitoring and quick action are essential to maintaining a healthy and productive system. In my early days, I learned that ignoring small signs often leads to bigger headaches. If you’re encountering broader hydroponic issues, our guide on Troubleshoot Common Hydroponic Plant Problems: 7 Expert Ways can provide more general solutions.
One of the most frequent challenges is nutrient imbalance, which can be avoided by regularly checking the EC and pH of your solution.
Addressing problems swiftly ensures your efforts to **Build a Hydroponic Microgreen System** remain fruitful.
Common Issues and Solutions
- Mold or Fungal Growth:
- Problem: Fuzzy white or grey patches on seeds or growing medium. Often caused by high humidity, poor airflow, or overcrowding.
- Solution: Increase air circulation with a small fan, reduce humidity, and ensure seeds aren’t excessively dense. Some growers use a very dilute hydrogen peroxide spray.
- Stunted Growth or Yellowing Leaves:
- Problem: Plants aren’t growing or leaves are pale. This often indicates nutrient deficiency or incorrect pH.
- Solution: Check pH and EC/TDS levels of your nutrient solution. Adjust pH to 5.5-6.5 and ensure nutrient concentration is appropriate for microgreens. Ensure sufficient light.
- Leggy or Stretched Microgreens:
- Problem: Tall, thin, and weak stems. This is a sign of insufficient light.
- Solution: Lower your LED grow lights closer to the trays (e.g., 6-8 inches) or increase the light intensity. Ensure 12-16 hours of light per day.
- Poor Germination:
- Problem: Many seeds fail to sprout. Can be due to old seeds, improper hydration, or temperature.
- Solution: Use fresh, high-quality seeds. Ensure the growing medium is consistently moist but not waterlogged. Maintain a warm germination temperature (70-75°F or 21-24°C).
- Algae Growth in Reservoir:
- Problem: Green slime forming in the nutrient reservoir. Caused by light exposure to the solution.
- Solution: Use an opaque reservoir or cover any clear containers to block light. Algae compete with plants for nutrients.
Integrating Smart Tech for Your Hydroponic Microgreen Garden
Integrating smart technology into your hydroponic microgreen garden can significantly enhance efficiency, reduce manual labor, and optimize growing conditions for superior yields. From automated watering to environmental monitoring, smart tech transforms the way you **Build a Hydroponic Microgreen System**, making it more precise and less demanding. This is where modern gardening truly shines, allowing for consistent results with minimal intervention.
Jonah Krochmalnek, founder of Living Earth Farm, emphasizes the importance of automated watering systems at scale, noting that “watering by hand is something at scale doesn’t really make a whole lot of sense.”
This principle applies even to smaller home setups, where automation can free up your time and improve consistency.
By leveraging smart devices, you can create an automated microgreen system that virtually runs itself, providing ideal conditions around the clock. This not only streamlines the growing process but also leads to healthier, more robust microgreens.
Smart Tech for Your Hydroponic System
- Smart LED Grow Lights:
- Function: Connect to Wi-Fi, allowing you to control light schedules, intensity, and spectrum from your smartphone.
- Benefit: Fine-tune lighting to specific microgreen varieties, optimize energy use, and simulate natural light cycles.
- Automated Watering/Nutrient Dosing Systems:
- Function: Use sensors to monitor water levels and nutrient concentration (EC/TDS) in the reservoir, automatically adding water or nutrient solution as needed.
- Benefit: Ensures consistent nutrient delivery, prevents deficiencies or toxicities, and eliminates manual watering tasks. Nova Grow kits often include self-watering features.
- Environmental Sensors:
- Function: Monitor temperature, humidity, and CO2 levels in your growing area.
- Benefit: Provides real-time data and alerts, allowing you to adjust climate control systems (fans, heaters) to maintain optimal growing conditions.
- Smart Plugs and Timers:
- Function: Control power to pumps, fans, and lights on a precise schedule or based on sensor input, all manageable via an app.
- Benefit: Automates daily routines, enhances energy efficiency, and offers remote control over your system.
- Webcams for Remote Monitoring:
- Function: Allows you to visually check on your microgreens from anywhere.
- Benefit: Provides peace of mind and allows for early detection of physical issues without being physically present.
Frequently Asked Questions
What is the easiest hydroponic system for microgreens?
The easiest hydroponic system for microgreens is typically the **wick system**, as it is a passive method requiring no pumps or electricity. This simple setup relies on capillary action to deliver nutrient-rich water to the plants, making it ideal for beginners. It simplifies the process to Build a Hydroponic Microgreen System, focusing on basic plant care.
Can you grow microgreens hydroponically without a pump?
Yes, you can absolutely grow microgreens hydroponically without a pump, primarily by using a **wick system**. This method utilizes a wick to passively draw nutrient solution from a reservoir to the growing medium, eliminating the need for any electrical components like pumps or air stones. This makes it a great choice for those seeking to Build a Hydroponic Microgreen System on a budget or with limited access to power.
Do hydroponic microgreens need nutrients?
Yes, hydroponic microgreens critically need nutrients, as they are grown in an inert medium without soil to supply essential minerals. A balanced hydroponic nutrient solution provides all the necessary macro and micronutrients for vigorous growth, contributing to their high nutritional content. Microgreens can contain 4 to 40 times more nutrients than their mature counterparts, according to the IMARC Group (2025), a benefit directly linked to precise nutrient delivery.
What is the best medium for hydroponic microgreens?
The best medium for hydroponic microgreens offers excellent moisture retention, good aeration, and is inert, with popular choices including **coco coir, rockwool, and hemp mats**. Vegbed Bamboo Grow Mats are also highly recommended for their positive impact on germination and root development. The ideal medium provides crucial physical support for the plants when you Build a Hydroponic Microgreen System.
What microgreen varieties perform best in hydroponics?
Several microgreen varieties perform exceptionally well in hydroponic systems due to their rapid growth and robust nature, including **broccoli, radish, sunflower, and pea shoots**. Broccoli microgreens, in particular, held the largest share at 24.1% of the United States microgreens market in 2025, according to Mordor Intelligence (2026), largely due to their nutritional benefits and ease of cultivation. These varieties are excellent choices for anyone looking to Build a Hydroponic Microgreen System with reliable results.
Learning to **Build a Hydroponic Microgreen System** is an incredibly rewarding endeavor that brings fresh, nutrient-dense produce right to your fingertips. Whether you choose a simple wick system or a more advanced automated setup, the principles of proper lighting, balanced nutrition, and consistent monitoring remain key. By applying these methods and insights, you’ll be well on your way to enjoying a continuous harvest of vibrant microgreens. Start small, experiment, and watch your indoor garden flourish!