Are your beloved houseplants looking a little lackluster, perhaps growing slower than usual, or even pushing roots out of their pot? Understanding when and how to repot indoor plants is a fundamental skill for any plant parent looking to refresh growth and ensure long-term vitality. This comprehensive guide will walk you through identifying the signs, choosing the right supplies, performing the repotting process, and even tailoring your approach for specific plant types, ensuring your green companions thrive.
How Do You Know When an Indoor Plant Needs Repotting?
Identifying the right moment to repot your indoor plants is crucial for their continued health and vigorous plant growth. The most obvious sign is when roots start to emerge from the drainage holes at the bottom of the pot, or even grow out of the top soil surface.
What most people miss are the more subtle cues. If your plant’s growth has significantly slowed, or if it seems to dry out much faster than it used to, it might be becoming pot-bound plants. This happens when the root system has completely filled the container, leaving little room for soil to hold water or nutrients.
Another indicator is if you gently lift the plant from its pot and discover a dense, matted ball of roots circling the inside of the container. As Richard, a plant expert at Patch Plants, states, “The best way to tell whether your plant needs to be repotted is by checking the root structure. If the roots are visibly pushing through the drainage holes in the nursery pot or through the soil on top, it’s probably time.”
What Is the Best Time to Repot Indoor Plants?
The short answer is typically during the plant’s active growing season. For most indoor plants, this means spring or early summer.
During these months, plants are naturally putting energy into new foliage and root development, making them more resilient to the stress of repotting. Penn State Extension advises, “The best time to repot a plant is in the spring when it naturally and actively begins its seasonal growth. The roots will grow into the new potting mix, and the plant will produce new foliage.”
While spring is ideal, you can repot a plant any time of year if it’s showing severe signs of distress, like wilting despite adequate watering. However, repotting during fall or winter, when growth slows, can cause more stress and a longer recovery period, so it’s generally best to wait if possible.
Choosing the Right Potting Mix and Container Size
Selecting the appropriate potting mix and container size is just as important as the repotting process itself. The right choices provide the foundation for healthy root development and sustained plant growth.
Selecting the Ideal Potting Mix
Your choice of soil is critical because it directly impacts drainage, aeration, and nutrient availability. For most houseplants, a high-quality, well-draining indoor potting mix is essential. Brands like FoxFarm Happy Frog Soil or Miracle-Gro Houseplant Potting Mix are popular choices that offer a good balance of nutrients and structure.
However, specific plants have unique needs. Succulents and cacti, for example, require a grittier, fast-draining mix like Bonsai Jack Succulent and Cactus Soil to prevent root rot. Orchids, on the other hand, thrive in a specialized orchid bark mix that provides excellent aeration and quick drainage, mimicking their epiphytic nature.
Always avoid using garden soil, as it’s too dense for containers and can introduce pests and diseases. The goal is to provide a fresh, nutrient-rich environment for your plant’s roots.
Determining the Correct Container Size
When choosing a new pot, resist the urge to go too large. For most plants, the University of Georgia Extension recommends a general rule: “choose a pot 3 to 4 in. larger in diameter than the current container.” This provides enough room for new root growth without overwhelming the plant with too much soil, which can lead to excess moisture and root rot.
Ensure the new pot has ample drainage holes. Without proper drainage, water can accumulate at the bottom, suffocating roots and creating an ideal environment for fungal diseases. While decorative pots without holes are appealing, always use a nursery pot with drainage inside a cachepot to prevent waterlogging.
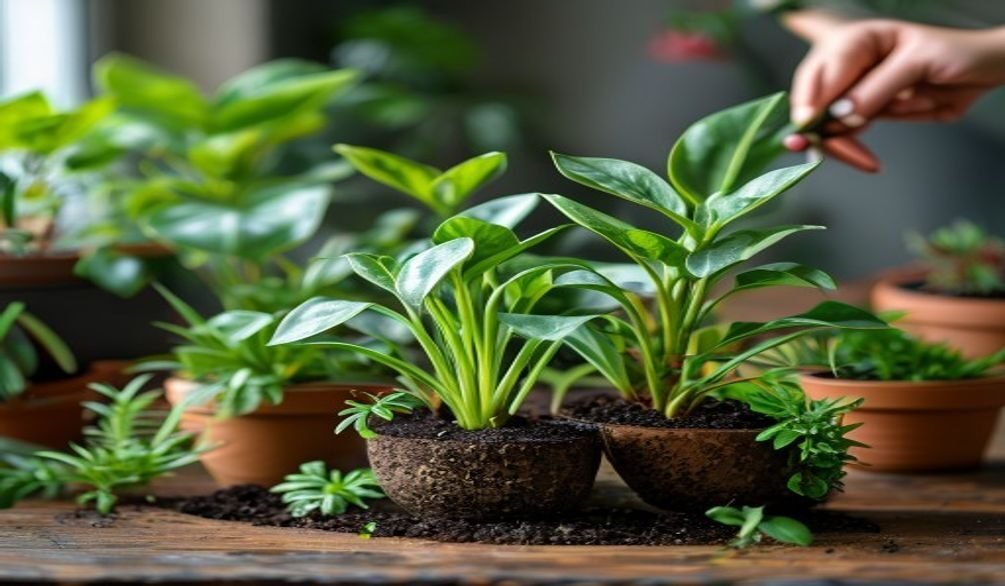
Step-by-Step Guide: How to Repot an Indoor Plant
Repotting can seem intimidating, but with the right approach, it’s a straightforward process that invigorates your plants. Here’s a clear guide on when and how to repot indoor plants effectively:
- Gather Your Supplies: You’ll need your new pot, fresh new potting soil, a watering can, a soil scoop, a soil knife or trowel, and optionally, a potting mat or old newspaper to keep your workspace clean.
- Water Your Plant: Water your plant thoroughly a day or two before repotting. This helps loosen the soil and makes it easier to remove the plant without damaging the roots.
- Prepare the New Pot: Add a layer of fresh potting mix to the bottom of the new container, enough so that when your plant is placed on top, the base of the plant is about an inch below the rim.
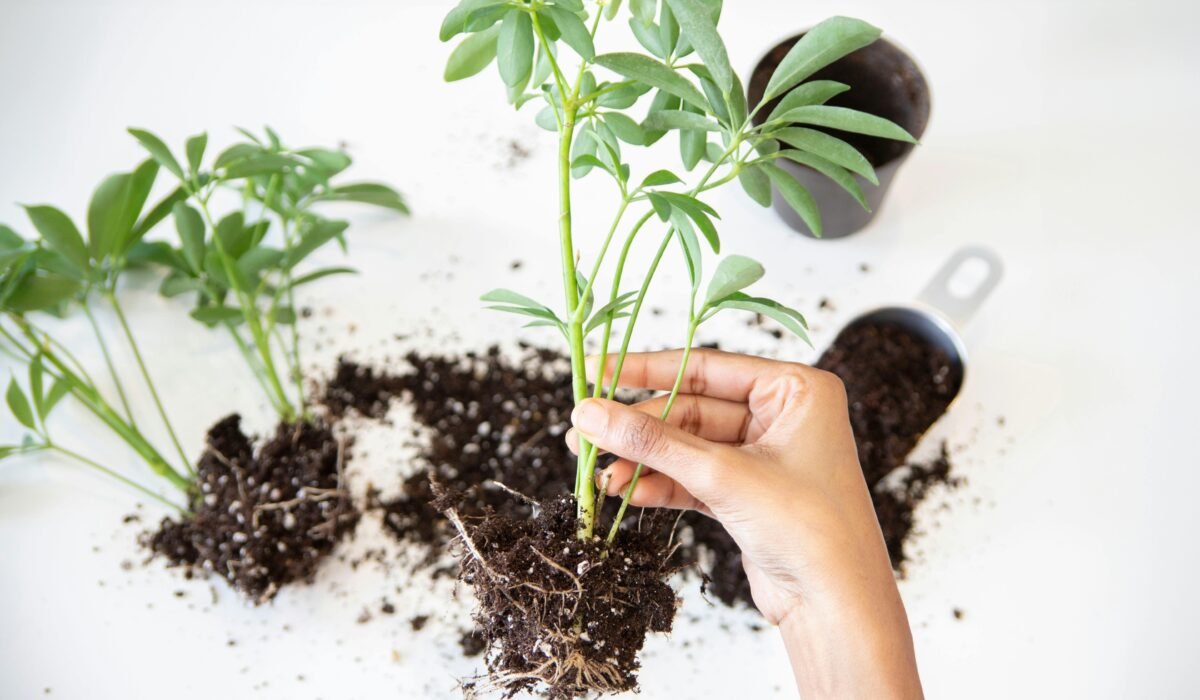
- Remove the Plant from its Old Pot: Gently turn the plant sideways or upside down, supporting the base of the stem. Tap the rim of the old pot against a hard surface to loosen the root ball. If it’s stubborn, you might need to use a soil knife to run around the inside edge.
- Inspect and Loosen Roots: Once out, carefully inspect the root ball. If the roots are tightly matted or circling, gently tease them apart with your fingers or a soil knife. You can prune away any dark, mushy, or damaged roots using clean scissors. For more insights on root health, consider optimizing hydroponic root health, as similar principles apply to soil-grown plants.
- Place in New Pot: Center the plant in its new pot, ensuring the base of the plant is at the same level as it was in the old pot. Fill around the root ball with fresh potting mix, gently tamping down the soil to remove large air pockets. Leave about an inch of space from the soil surface to the rim for watering.
- Water Thoroughly: Water your newly repotted plant immediately and generously until water drains from the bottom. This helps settle the soil and provides initial hydration.
After repotting, avoid fertilizing for a few weeks to allow the roots to adjust to their new environment. The fresh potting mix should provide sufficient nutrients initially. For general plant nutrition, you might find our basic garden fertilizers guide helpful once your plant has settled.
Preventing and Recovering from Transplant Shock
Even with the best intentions, repotting can be a stressful event for plants, often leading to what’s known as transplant shock. This temporary setback is a plant’s reaction to changes in its root environment, moisture levels, and even light exposure.
Recognizing Transplant Shock Symptoms
Common transplant shock symptoms include wilting leaves, stunted growth, and the appearance of yellow leaves after repotting. Your plant might look generally unhappy, droopy, or just stop growing altogether for a period.
These symptoms typically appear within a few days to a couple of weeks after repotting. It’s important to differentiate these from signs of overwatering or underwatering, though sometimes transplant shock can make plants more susceptible to these issues.
Strategies for Prevention and Recovery
To minimize transplant shock, handle your plant gently during the process, disturbing the roots as little as possible. After repotting, place the plant in a location with indirect, bright light, avoiding harsh direct sun for a week or two. Maintain consistent moisture, but do not overwater; allow the top inch or two of soil to dry slightly between waterings.
Increasing humidity around the plant can also aid recovery. You can do this with a pebble tray, a humidifier, or by grouping plants together. For more ideas, check out our guide on how to increase indoor plant humidity. Avoid fertilizing immediately after repotting, as the new soil provides ample nutrients, and added fertilizer can burn stressed roots. Patience is key; most plants will recover and resume healthy growth within a few weeks.
Repotting Specific Indoor Plant Types: Tailored Advice
While general repotting guidelines apply to most plants, some popular indoor plant types have specific needs that warrant tailored advice. Understanding these nuances can make all the difference in their post-repotting success.
Fast-Growing Aroids (Monstera, Pothos, Philodendron)
Plants like Monstera deliciosa and Pothos are known for their vigorous growth and often require more frequent repotting, sometimes annually. Costa Farms notes that “Most houseplants can live happily in the same pot for years. But some fast-growing species such as philodendron or pothos may outgrow their home and need repotting every year or so.” They benefit from a rich, well-draining potting mix, often amended with perlite or orchid bark for extra aeration. When repotting a Monstera, ensure you provide a support stake or moss pole for its aerial roots.
Succulents and Cacti
These desert dwellers prefer to be somewhat root-bound and don’t need frequent repotting. When you do repot, choose a pot only slightly larger (about an inch more in diameter) and use a specialized succulent and cactus mix. This gritty, fast-draining soil is crucial to prevent root rot, which succulents are highly susceptible to. Always allow the soil to dry out completely before watering after repotting.
Snake Plant (Sansevieria) and ZZ Plant
The resilient Snake Plant and ZZ Plant actually prefer to be quite pot-bound plants. They thrive when their roots are snug, so you might only need to repot them every 2-5 years, or even less frequently. When you do repot a snake plant, choose a heavy, stable pot as they can become top-heavy. Use a well-draining regular houseplant potting mix, possibly with some added perlite for extra drainage.
Orchids
Orchids are unique in that they typically don’t grow in soil. Instead, they require a specialized orchid potting mix, usually composed of bark, sphagnum moss, or a combination. Repotting is usually done every 1-2 years or when the mix starts to break down. Always use a pot with excellent drainage and aeration, often with side holes, to mimic their natural epiphytic environment.
Beyond Repotting: Top-Dressing and Root Pruning for Plant Health
Sometimes, a full repotting isn’t the best solution, especially for very large plants or if you want to maintain a specific size. This is where advanced techniques like top-dressing and root pruning come into play, offering alternatives to refresh your plant’s environment and control its growth.
Top-Dressing: Refreshing Old Potting Soil
Top-dressing involves removing the top few inches of old, depleted soil from a pot and replacing it with fresh, nutrient-rich new potting soil. This method is perfect for large plants that are difficult to move or for those that don’t need a full pot size increase but could benefit from revitalized nutrients.
To top-dress, simply scrape away the top 1-3 inches of soil, being careful not to damage surface roots. Then, fill the space with fresh potting mix, gently pressing it down. This process helps with soil refreshing, provides a boost of nutrients, and can improve water penetration without the stress of a full repot.
Root Pruning Houseplants for Size Control
Root pruning houseplants is a more advanced technique used to keep a plant in its current container size, or even reduce it, while still promoting healthy growth. This is particularly useful for plants you wish to maintain at a certain size or for bonsai enthusiasts.
When root pruning, you remove the plant from its pot and carefully cut away a portion of the outer and bottom roots, typically about 1/4 to 1/3 of the total root mass. Simultaneously, you should prune back the foliage to match the reduction in roots, which helps balance the plant and prevent stress. After pruning, repot the plant back into the same container with fresh potting mix. This encourages the development of new, healthy roots within the existing space.
What Happens If You Don’t Repot a Plant?
Neglecting to repot a plant when it’s necessary can lead to a cascade of problems that hinder its health and vibrancy. Essentially, the plant becomes trapped, unable to access the resources it needs to thrive.
The most immediate consequence is stunted plant growth. With no room for roots to expand, the plant simply cannot grow larger or produce new foliage efficiently. Over time, the existing potting mix degrades, losing its structure and nutrient content, leading to nutrient deficiencies.
Furthermore, a pot-bound plant will struggle with water absorption and retention. The dense root ball can prevent water from penetrating deeply, causing it to run straight through, or conversely, lead to waterlogging if the soil structure has completely broken down. Ultimately, a plant that isn’t repotted can slowly decline, becoming more susceptible to pests and diseases, and eventually, it may die due to a lack of resources and an unhealthy root environment.
Frequently Asked Questions
How do you know when an indoor plant needs repotting?
You can tell an indoor plant needs repotting if roots are growing out of the drainage holes or on the soil surface, if the plant’s growth has slowed significantly, or if the soil dries out unusually fast. Gently lifting the plant to inspect a dense, circling root ball is also a clear indicator.
What is the best time to repot indoor plants?
The best time to repot indoor plants is generally during their active growing season, which is typically spring or early summer. This allows the plant to recover faster and establish new roots in the fresh potting mix more efficiently.
How do you refresh old potting soil?
You can refresh old potting soil through a technique called top-dressing, where you remove the top few inches of depleted soil and replace it with fresh, nutrient-rich potting mix. This provides a nutrient boost and improves soil structure without the full stress of a complete repotting.
What size pot should I repot my plant into?
For most indoor plants, you should repot into a container that is 3 to 4 inches larger in diameter than the current pot. This provides adequate space for new root growth without overwhelming the plant with too much soil, which can lead to moisture issues.
Mastering when and how to repot indoor plants is a cornerstone of successful houseplant care, ensuring your green companions remain vibrant and healthy. By recognizing the signs, choosing the right supplies, and applying thoughtful techniques, you empower your plants to thrive. Don’t let your plants get stuck; embrace the repotting process as an essential step in their journey to refresh growth and flourish in your home.