Are your tiny seedlings starting to look a little crowded in their starter trays? If you’ve ever wondered when and how to give your young plants more room to grow, you’re in the right place! Learning how to pot up seedlings is a game-changer for any gardener, especially beginners, setting your plants up for robust health and a bountiful harvest.
Why Pot Up Seedlings? The Benefits of Up-Potting
You might hear this process called “up-potting plants” or “potting on,” but whatever the name, the goal is the same: to give your growing seedlings more space. This crucial step transitions your young plants from their initial small cells to larger containers, allowing them to stretch out before they’re ready for their final home outdoors.
The main benefit is fostering strong seedling root development. When roots have room to grow outwards and downwards, they become more robust and less likely to become root-bound, which can stunt growth. This process encourages healthier, bushier plants with stronger stems, able to access more nutrients and moisture.
Many plants, especially those with a long indoor growing period like tomatoes, peppers, eggplants, and various herbs, truly thrive from this intermediate step. I remember the first time I saw roots circling a small pot – it was a clear sign my little plant was begging for more room! Giving them that extra space can significantly improve their overall health and eventual yield.
Signs Your Seedlings Are Ready to Be Potted Up
Knowing exactly when to pot on seedlings is key to their success. There are several clear indicators that your tiny plants are ready for an upgrade, typically around 3-4 weeks after germination. For vigorous growers, like many vegetables, you might find yourself potting up seedlings every 2-3 weeks.
Here are the signs to look for:
- True Leaves Appear: Beyond the initial two seed leaves (cotyledons), your seedling should develop at least two sets of “true leaves.” These are the leaves that look like miniature versions of the mature plant’s foliage, signaling it’s ready for more nutrients than the cotyledons can provide. You can learn more about cotyledons and true leaves on Wikipedia.
- Roots Visible: Gently check the drainage holes at the bottom of the current container. If you see roots peeking out, or if you carefully slide the seedling out and the root ball is dense and tangled, it’s definitely time.
- Crowding: If you have multiple seedlings growing in a single small cell, they’ll soon start competing for light, water, and nutrients. Separating and potting them up gives each one a fighting chance.
- Plant Height: For taller plants like tomatoes and peppers, if the plant’s growth above the soil is more than twice the depth of the soil, it’s likely feeling cramped and needs a deeper pot.
It’s almost like they’re waving little flags saying, “More space, please!” Observing these signs will help you provide timely seedling care tips and ensure a smooth transition.
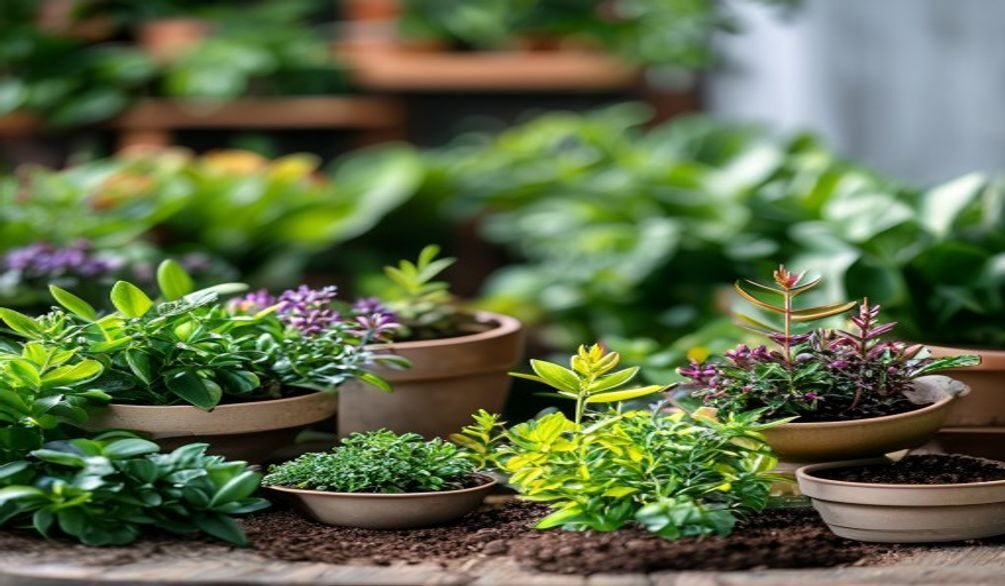
Choosing the Right Pot Size and Potting Mix
Once you know your seedlings are ready, the next step is selecting their new temporary home. This involves picking the appropriate pot size and, just as importantly, the best potting mix for seedlings. Making the right choices here can make a huge difference in preventing transplant shock and promoting healthy growth.
Selecting the Perfect Pot Size
The general rule of thumb for potting up is to go “one size up.” This means choosing a pot that is 1-2 inches larger in diameter than the current one for smaller plants, and 2-4 inches larger for bigger, faster-growing varieties like tomatoes or peppers. For instance, if your seedling is in a 2-inch deep cell, a 4-inch or even a 6-inch deep container would be a good next step. Avoid jumping to a much larger pot too quickly, as this can lead to issues like overwatering.
Choosing the Best Potting Mix
A high-quality potting mix is absolutely crucial for your delicate seedlings. It needs to provide excellent drainage while still retaining enough moisture and offering some initial nutrients. Forget about using regular garden soil, as it’s too heavy and can introduce pests or diseases.
Look for a mix that is:
- Rich in organic matter: Ingredients like compost or worm castings provide gentle nutrients. For more on boosting soil naturally, check out our guide on Compost Tea.
- Well-draining yet moisture-retentive: This balance is vital.
- Light and airy: To allow roots to grow easily and prevent compaction.
Many excellent commercial options are available, often containing coconut coir, perlite, and vermiculite. Coconut coir is a fantastic sustainable alternative to peat moss, offering superb moisture retention and aeration. If you’re feeling adventurous, you can even make your own DIY mix with a base of 70% coco coir, 20% perlite, and 10% fine compost. Choosing the right mix feels like giving your plants a gourmet meal – they really thrive on it!
Step-by-Step: How to Pot Up Seedlings Gently
Transplanting seedlings can feel a bit nerve-wracking, but with a gentle hand and careful steps, you’ll minimize stress and set your plants up for success. The key is to handle them with care to prevent transplant shock.
Here’s a simple, step-by-step guide to gently pot up seedlings:
- Prepare Your New Pots: Fill your chosen larger pots about two-thirds full with your damp, fresh potting mix. Make sure the mix is moist but not soaking wet.
- Loosen the Seedling: Gently squeeze the sides of the old pot or use a small tool to loosen the soil around the seedling. If it’s in a tray, you might need to push from the bottom drainage hole.
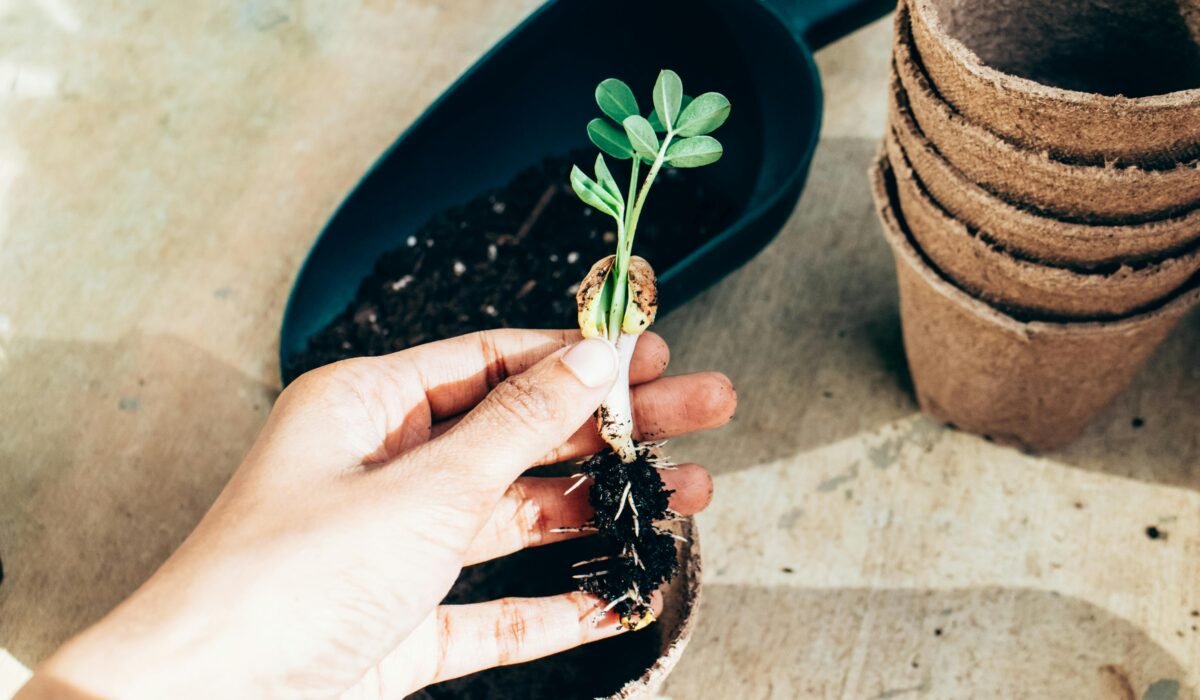
- Carefully Remove the Seedling: The most crucial step! Hold the seedling by one of its true leaves, never by the stem. The stem is much more fragile and easily damaged than a leaf. Gently ease the entire root ball out of its original container. Try to keep the soil around the roots as intact as possible.
- Create a Hole: In the new pot, use your finger or a dibble tool to create a hole large enough to comfortably accommodate the seedling’s root ball.
- Place the Seedling: Carefully lower the seedling into the new hole. Ensure the top of the root ball is at the same level as, or slightly below, the soil line in the new pot. For plants like tomatoes, you can even bury part of the stem, as they’ll grow roots from it.
- Fill and Firm: Gently fill the rest of the pot with potting mix, lightly firming it around the seedling’s base. You want to eliminate large air pockets, but avoid compacting the soil too tightly, as roots need air.
- Water Thoroughly: Immediately after potting, give your seedling a good, gentle watering. This helps settle the soil around the roots and provides much-needed moisture.
This is where a gentle touch really pays off, like handling a newborn. Taking your time will make all the difference in helping your plants recover quickly and continue to grow.
Essential Tools for Successful Potting Up
You don’t need a huge arsenal of equipment for potting up seedlings, but having a few key tools can make the process much smoother and more efficient, especially for gardening for beginners. Investing in these basics will improve your seedling care tips and overall success.
Here’s what you’ll find most useful:
- New Pots: As discussed, choose pots that are “one size up.” Consider options like plastic greenhouse pots, biodegradable pots, or even recycled containers with good drainage. Air-prune trays are a recent innovation with side slits that naturally prune roots, preventing them from circling and becoming root-bound, which is fantastic for healthier root systems.
- High-Quality Potting Mix: Have plenty on hand, pre-moistened to a damp, crumbly consistency.
- Small Trowel or Transplanter: A sturdy, small trowel or a specialized transplanter (like the Fiskars Big Grip Transplanter) is perfect for scooping soil and making holes without damaging roots.
- Watering Can with a Gentle Rose: A watering can with a fine shower head ensures you water gently without dislodging delicate seedlings or compacting the soil too much.
- Dibble and Widger Set: A dibble is a pointed tool used to make holes, and a widger is a flat, spade-like tool for lifting delicate seedlings. These are particularly useful for very tiny plants.
- Gardening Gloves: Optional, but they keep your hands clean and protect them from soil and any irritants.
Having the right tools makes the whole process so much smoother and more enjoyable. Think of them as your gardening sidekicks!
Avoiding Transplant Shock and Common Mistakes
Transplant shock is a temporary setback that can occur when a plant is moved from one environment to another. While some stress is normal, you can take steps to prevent transplant shock and minimize its impact on your newly potted plants. Recognizing the signs and avoiding common mistakes will greatly improve your success.
Recognizing and Preventing Transplant Shock
Symptoms of transplant shock include wilting, yellowing leaves, stunted growth, or even leaf drop. This happens because the plant’s root system is disturbed, making it harder for it to absorb water and nutrients.
To prevent transplant shock:
- Handle Gently: Always hold seedlings by their leaves, not their fragile stems.
- Water Immediately: Give a good drink of water right after potting to settle the soil and hydrate the roots.
- Maintain Consistent Conditions: Try to keep light, temperature, and humidity similar to their previous environment for a few days. Avoid placing them in direct, harsh sun immediately.
- Don’t Fertilize Immediately: Wait about a week or two before introducing any fertilizer. The roots need time to recover before they can effectively absorb new nutrients.
- Avoid Overwatering: While watering is crucial, too much water can lead to root rot. Ensure good drainage and let the top layer of soil dry slightly between waterings.
For more detailed information on preventing transplant shock and seedling care tips, resources like the University of Minnesota Extension offer excellent guides on starting seeds indoors.
Common Potting Up Mistakes
Even experienced gardeners make mistakes! Here are a few to watch out for:
- Waiting Too Long (or Potting Too Early): Potting up too late can lead to root-bound plants, while potting too early might mean the seedling isn’t robust enough to handle the move. Look for those true leaves and visible roots!
- Using Garden Soil: As mentioned, garden soil is too heavy for containers and can contain pathogens or weed seeds that will harm your delicate seedlings.
- Compacting the Soil Too Much: Roots need air as much as water. Overly compacted soil suffocates roots and hinders growth.
- Not Watering Properly: Both underwatering and overwatering can be detrimental. Aim for consistently moist, but not soggy, soil.
Think of it like moving to a new house – a little stress is normal, but too much can be avoided with careful planning and gentle execution.
Potting Up vs. Starting in Larger Pots: What’s Best?
A common question, especially for beginners, is whether it’s truly necessary to go through the extra step of potting up seedlings, or if you can simply start seeds in larger pots from the get-go. While starting in larger pots might seem like a time-saver, there are distinct advantages to the traditional potting up method that contribute to stronger, healthier plants.
The Case for Potting Up
Potting up encourages superior seedling root development. When a seedling grows in a small cell, its roots quickly reach the edges, prompting them to branch out and create a denser, more fibrous root ball. This robust root system is better equipped to support vigorous growth once the plant matures. If you were to start a tiny seed in a huge pot, the roots might just grow straight down, not developing that essential branching.
Furthermore, smaller pots dry out faster, which helps prevent overwatering – a common pitfall for young seedlings. Excess moisture in a large pot can lead to damping-off disease or root rot, especially when the tiny roots aren’t yet able to absorb all the water. Smaller pots also conserve potting mix and space, which is a big plus if you’re starting many seeds indoors. I’ve found that the “potting up” method consistently gives me stronger, happier plants in the long run.
Drawbacks of Starting in Larger Pots
While you *can* start some seeds directly in larger pots (especially large-seeded plants that grow quickly, like squash), it comes with risks. The primary concern is overwatering. A small seedling in a large volume of soil can’t absorb all the moisture, leaving the unused soil soggy for extended periods. This creates an ideal environment for harmful fungi and bacteria. Also, the roots might not colonize the entire pot efficiently, leading to less robust initial growth.
Ultimately, for most common garden vegetables and flowers, the benefits of potting up seedlings far outweigh the convenience of starting directly in larger containers. It’s a small investment of time that pays off with healthier, more resilient plants ready for their final home, whether that’s a raised bed or a container garden. For tips on preparing for that next step, check out our guide on Starting Your Raised Bed Garden.
Frequently Asked Questions
When is the ideal time to pot up seedlings?
The ideal time is usually when your seedlings have developed at least two sets of true leaves (not the initial cotyledons), when you see roots emerging from the drainage holes, or when multiple seedlings in a cell start to look crowded. This typically happens 3-4 weeks after germination.
What is the correct pot size to use when potting up?
A good rule of thumb is to go “one size up.” For smaller plants, this means a pot 1-2 inches larger in diameter. For larger, faster-growing seedlings like tomatoes or peppers, you might choose a pot 2-4 inches larger. Avoid jumping to a significantly oversized pot.
What kind of soil mix should I use for potting up?
Use a high-quality, sterile potting mix that is light, airy, and drains well while retaining moisture. Look for mixes containing ingredients like coconut coir, perlite, and vermiculite, often with a small amount of compost or worm castings for gentle nutrients. Avoid heavy garden soil.
Is potting up always necessary, or can I just start seeds in larger pots?
While not always strictly “necessary” for every single plant, potting up is highly beneficial for most seedlings. It encourages stronger root development, helps prevent overwatering in the early stages, and allows you to conserve space and potting mix. Starting in larger pots can increase the risk of overwatering and root rot for small seedlings.
Potting up seedlings is a fundamental skill that every gardener, especially beginners, should master. By giving your young plants the space and proper environment they need, you’re investing in their future health and productivity. So, grab your tiny trowel, prepare your potting mix, and give your little plants the upgrade they deserve! For ongoing care and nutrient advice for your thriving potted plants, you might find our guide on Balcony Garden Fertilizers helpful. Happy gardening!