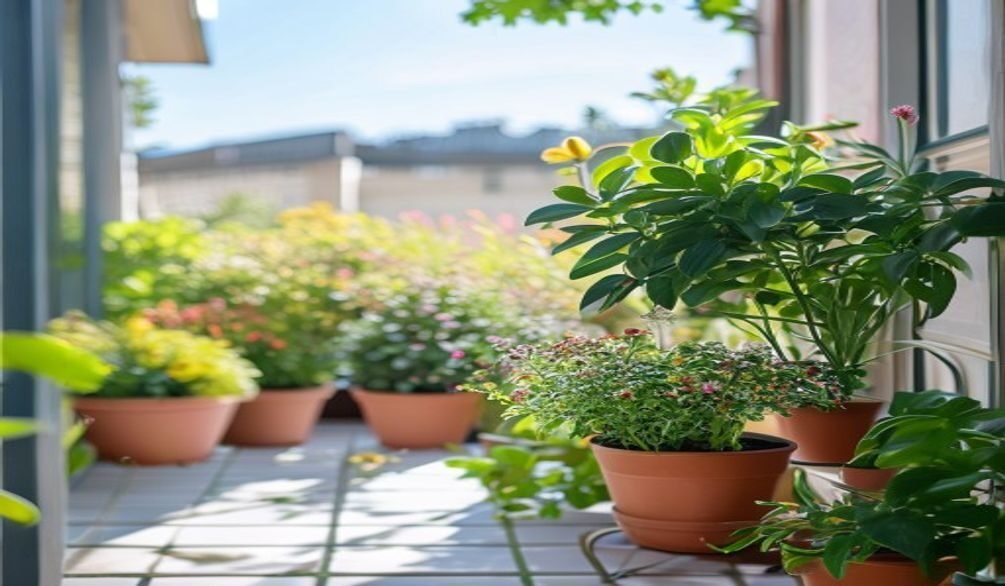
Dreaming of fresh, vibrant greens but living in a concrete jungle? You absolutely can grow microgreens on your balcony, transforming even the smallest outdoor space into a thriving, edible oasis. This guide will show you how to cultivate an abundant harvest of nutrient-dense greens right outside your door, making urban gardening accessible and rewarding.
What Are Balcony Microgreens and Why Grow Them?
Microgreens are simply young, edible seedlings of various vegetables and herbs, harvested when they’ve developed their first true leaves. They bridge the gap between sprouts and baby greens, offering an intense burst of flavor and a concentrated dose of nutrition. For apartment dwellers, balcony microgreens represent the ultimate solution for small space gardening and fresh produce access.
The appeal of growing microgreens on a balcony is clear: they mature rapidly, often ready for harvest in just 7-21 days, making them ideal for continuous, fast-growing vegetables. What most people miss is their incredible nutritional punch. According to Thomas Wang, an Agricultural Research Service (ARS) Chemist, research indicates that microgreens can contain significantly more nutrients than their full-grown counterparts, sometimes 5 to 40 times higher. For instance, USDA studies confirm that red cabbage microgreens are packed with Vitamin C.
This efficiency and nutritional superiority are driving a global trend. The microgreens market, valued at USD 3.24 billion in 2024, is projected to reach USD 8.25 billion by 2032, showcasing the immense interest in these nutrient-dense greens. Embracing balcony urban farming not only provides healthy food but also connects you with the satisfaction of growing your own.
Choosing the Right Microgreens for Your Balcony
Selecting the best microgreens for beginners on a balcony involves considering ease of growth, speed of harvest, and your available sunlight. Some varieties are far more forgiving and offer quicker gratification, making your initial seed starting experience a success.
For a reliable and quick harvest, focus on varieties like radish, broccoli, kale, arugula, and mustard. Radishes, for example, can be ready in as little as 5-7 days, while broccoli and kale offer a milder flavor profile and are typically ready in 8-14 days. These options are less fussy about perfect light conditions, making them excellent choices for varied balcony exposures.
Here’s a quick list of top choices for your balcony:
- Radish: Fast-growing, peppery flavor, vibrant colors.
- Broccoli: Mild, earthy taste, packed with nutrients.
- Kale: Slightly bitter, robust, excellent for health.
- Arugula: Zesty, quick to germinate and grow.
- Mustard: Spicy kick, very vigorous growth.
- Pea Shoots: Sweet, crunchy, and grow tall quickly, maximizing vertical space.
Setting Up Your Balcony Microgreens: Essential Gear & Steps
Getting started with balcony microgreens is surprisingly simple and doesn’t require extensive investment. The key is choosing the right equipment that fits your small space and ensures efficient growth. Many popular container gardening solutions and microgreen kits are designed specifically for this purpose.
Essential Gear for Your Balcony Microgreens
You’ll need a few basic items to kickstart your urban gardening project:
- Shallow Trays: Look for trays, typically 10×20 inches, with drainage holes and corresponding solid bottom trays to catch excess water. The Orta Gardens Microgreen Kit, for instance, uses eco-friendly self-watering ceramic trays.
- Growing Medium: Options include organic potting mix, coco coir, or specialized hydroponic mats. For organic growing, a sterile, fine-textured seed starting mix is excellent.
- High-Quality Seeds: Always buy seeds specifically labeled for microgreens, as they are tested for germination rates and food safety.
- Spray Bottle: Essential for gentle watering without disturbing delicate seedlings.
- Shears or Scissors: For clean harvesting.
- Optional: Weight: A brick or another tray to provide gentle pressure during germination helps create uniform growth.
Step-by-Step Balcony Microgreen Setup
Here’s how to set up your balcony microgreens for success:
- Prepare Your Trays: Fill your shallow tray with about 1-1.5 inches of your chosen growing medium. Gently level and compact it without making it too dense.
- Sow Your Seeds: Sprinkle seeds evenly across the surface of the medium. The goal is dense coverage without overlapping too much, as microgreens don’t need much individual space.
- Mist Thoroughly: Use your spray bottle to thoroughly moisten the seeds and medium.
- Blackout Period: Place another tray directly on top of the seeded tray, or use a light cover, creating a “blackout” period for 2-4 days. This encourages seeds to sprout and grow strong roots as they search for light. Some growers add a small weight (like a brick) on top to promote stronger root development.
- Introduce to Light: Once seeds have germinated and are about an inch tall, remove the cover and place the tray in its designated spot on your balcony, ensuring it receives adequate light.
Mastering Light & Water for Balcony Microgreens
The success of your balcony microgreens hinges on providing the right balance of light and water. Unlike mature plants, microgreens have specific, yet forgiving, needs that are crucial for their rapid development.
Balcony Light Requirements: Natural vs. Supplemental
Many people ask, “Do you need grow lights for microgreens on a balcony?” The short answer is often no, especially if your balcony gets decent natural sunlight. Most microgreens can thrive with 4-6 hours of direct sunlight daily. South-facing balconies are ideal, offering abundant light, but east or west-facing balconies can also work well, providing morning or afternoon sun.
What most people miss is how to handle partial sunlight. If your balcony receives only partial sunlight, choose varieties like kale or pea shoots, which are more tolerant. For north-facing balconies or very shaded spots, supplemental light might be beneficial. An Ingarden Microgreens Growing Kit, for example, includes an integrated grow light, making it suitable for low-light conditions. This is where hydroponics for beginners often comes into play, as controlled light environments are easier to manage.
Watering Techniques for Optimal Growth
Proper watering is critical to prevent issues like mold and ensure strong growth. Microgreens prefer consistent moisture but detest being waterlogged. Here’s the thing: bottom watering is generally the best method for balcony microgreens.
- Bottom Watering: Place your seeded tray (with drainage holes) inside a solid bottom tray. Pour water into the bottom tray, allowing the growing medium to absorb water from below. This prevents disturbing delicate seedlings and reduces the risk of fungal growth on the surface.
- Misting: During the initial blackout phase and for the first few days after introducing to light, misting the surface gently with a spray bottle can help keep seeds moist without overwatering.
How often should I water balcony microgreens? In practice, you should check your trays daily. The medium should feel consistently moist, not soggy. Depending on humidity, temperature, and light, you might need to bottom water every 1-2 days.
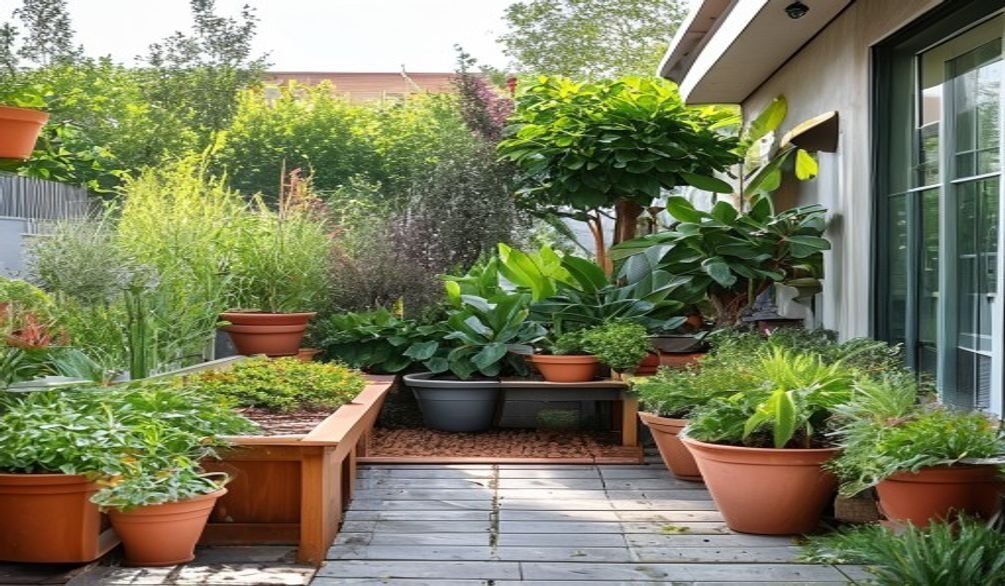
Overcoming Balcony Challenges: Year-Round Growing & Climate Control
Balconies present unique environmental challenges, from strong winds to extreme temperatures. However, with smart strategies, you can enjoy year-round growing and maintain a consistent harvest of balcony urban farming produce.
Managing Temperature Fluctuations
Can I grow microgreens year-round on a balcony? Absolutely, but it requires adaptation. During summer, west-facing balconies can get intensely hot. Position trays in shadier spots during peak afternoon sun, or use shade cloth. In cooler months, south-facing balconies are a boon. Consider moving trays indoors during frosty nights or using simple DIY cold frames made from clear plastic sheeting or old windows to create a microclimate. This insulates and protects your tender greens.
Dealing with Wind and Pests
Wind can quickly dry out your microgreens and even damage them. Place your trays in sheltered spots, perhaps behind railings or other plants. You can also create simple windbreaks using clear acrylic sheets or even repurposed cardboard. For pests, while microgreens are less susceptible than mature plants, occasionally aphids or fungus gnats can appear. Maintaining good air circulation and inspecting trays regularly are your first lines of defense. For organic growing, a diluted neem oil spray can act as a preventative.
What most people miss is that understanding your specific balcony’s microclimate is key. Observe how sun, wind, and shade move throughout the day and year. This insight will inform your placement and protection strategies, ensuring a continuous supply of fresh greens.
Maximizing Your Microgreen Harvest in Small Balcony Spaces
One of the biggest advantages of microgreens is their incredible space efficiency. Even the tiniest balcony can become a productive farm through clever design and vertical farming techniques. The goal is to maximize your microgreen harvest in limited space.
The Power of Vertical Farming
Vertical gardening is your best friend when space is at a premium. Instead of spreading out, build up! This approach allows you to multiply your growing area without taking up more floor space. You can easily achieve DIY vertical microgreens setups with readily available materials.
- Stacking Shelves: Simple shelving units, like a tiered plant stand, allow you to place multiple trays one above another. Ensure enough space between shelves for air circulation and light penetration.
- Wall-Mounted Planters: Fabric grow bags or small individual pots mounted on a wall can hold single trays or small batches.
- Repurposed Items: Old wooden pallets can be modified into vertical planters, or even hanging shoe organizers can be adapted for small trays.
A single 10×20 inch tray can yield approximately 200–300 grams of microgreens per harvest, typically every 7-14 days. Imagine stacking three or four of these trays – you’re looking at a significant, continuous supply from a footprint of just one tray!
Succession Planting and Crop Rotation
To ensure a continuous supply, practice succession planting. This means sowing new trays every few days or once a week, rather than all at once. By the time you harvest one tray, another will be nearly ready. Similarly, rotating the types of microgreens you grow can help keep your soil healthy (if using soil) and provide a varied nutritional intake.
Preventing & Managing Common Balcony Microgreen Issues
Even with careful planning, sometimes issues arise. Knowing how to prevent and manage common problems will keep your balcony microgreen operation thriving. The most frequent concern for beginners is often mold or fungal growth.
Preventing Mold and Fungal Growth
How do I prevent mold or fungal growth on microgreens? The key lies in three factors: good air circulation, proper watering, and sterile growing conditions. Mold thrives in stagnant, overly humid environments. Ensure your balcony setup allows for airflow around and between trays. Avoid overwatering, especially from the top, which can create a damp surface conducive to mold. Use fresh, sterile growing medium for each batch, and clean your trays thoroughly between uses.
Addressing Other Common Problems
- Uneven Growth: Often caused by uneven seed distribution or inconsistent light. Try to spread seeds as uniformly as possible and rotate trays periodically to ensure all areas receive adequate light.
- Leggy Seedlings: This indicates insufficient light. Microgreens stretch to find light, becoming thin and weak. Move trays to a brighter spot or consider supplemental lighting if natural light is truly inadequate.
- Pests: While less common, tiny pests like fungus gnats can be a nuisance. They are often attracted to overly moist soil. Allow the top layer of your growing medium to dry slightly between waterings, and ensure good drainage. Sticky traps can also help monitor and control populations.
In practice, regular observation is your best tool. Catching issues early makes them much easier to resolve, ensuring a healthy and productive harvest.
Is Growing Balcony Microgreens Worth It?
After considering the setup, care, and potential challenges, the burning question remains: is growing balcony microgreens worth it? For urban dwellers seeking fresh, healthy produce, the answer is a resounding yes. The benefits extend far beyond just having greens on hand.
From a health perspective, the nutritional superiority of microgreens is undeniable. As the USDA and ARS Chemist Thomas Wang have highlighted, these tiny greens pack a powerful punch of vitamins, minerals, and antioxidants. Incorporating them into your diet is a simple yet effective way to boost your overall well-being. Economically, while initial setup for hydroponics for beginners or even simple soil trays has a cost, the continuous yield can quickly outweigh the expense of buying store-bought microgreens, which are often pricey and have a short shelf life. The urban farming market, valued at USD 140.87 billion in 2024, is projected to reach USD 212.72 billion by 2031, underscoring the growing value placed on local, fresh food.
Beyond the tangible benefits, there’s immense satisfaction in cultivating your own food. It’s a connection to nature, a sustainable practice, and a constant source of fresh, organic growing produce for your kitchen. Balcony microgreens are a hyper-efficient, year-round solution for anyone looking to enhance their diet and embrace urban gardening.
Frequently Asked Questions
Can microgreens grow in partial sunlight?
Yes, many microgreens can grow successfully in partial sunlight, typically needing 4-6 hours of indirect or morning sun. Varieties like kale, pea shoots, and spinach are more tolerant of lower light conditions, though growth might be slightly slower than in full sun.
How often should I water balcony microgreens?
You should check your balcony microgreens daily for moisture levels. The growing medium should feel consistently moist but never soggy. Bottom watering every 1-2 days, depending on environmental factors like temperature and humidity, is often the most effective method to maintain ideal moisture.
How do I prevent mold or fungal growth on microgreens?
Preventing mold on microgreens involves ensuring good air circulation, avoiding overwatering, and maintaining sterile conditions. Use clean trays and fresh, sterile growing medium for each batch, and consider using a small fan or ensuring natural breezes to prevent stagnant, humid air.
Do you need grow lights for microgreens on a balcony?
No, you generally don’t need grow lights for microgreens on a balcony if it receives adequate natural sunlight, ideally 4-6 hours daily. However, for north-facing balconies, heavily shaded areas, or year-round growing in winter, supplemental grow lights can significantly improve growth and yield.
Embracing balcony microgreens is a truly rewarding endeavor, offering a continuous supply of fresh, nutritious greens right at your fingertips. Take the first step today and transform your balcony into a vibrant, productive urban farm.