Are you struggling to keep your vertical garden perfectly watered without waste, wondering if there’s a more efficient way to nourish your plants? Setting up a drip irrigation for vertical garden is not only possible but also the most effective solution for consistent hydration and thriving greenery, eliminating common watering headaches.
What is Drip Irrigation and How Does It Benefit Vertical Gardens?
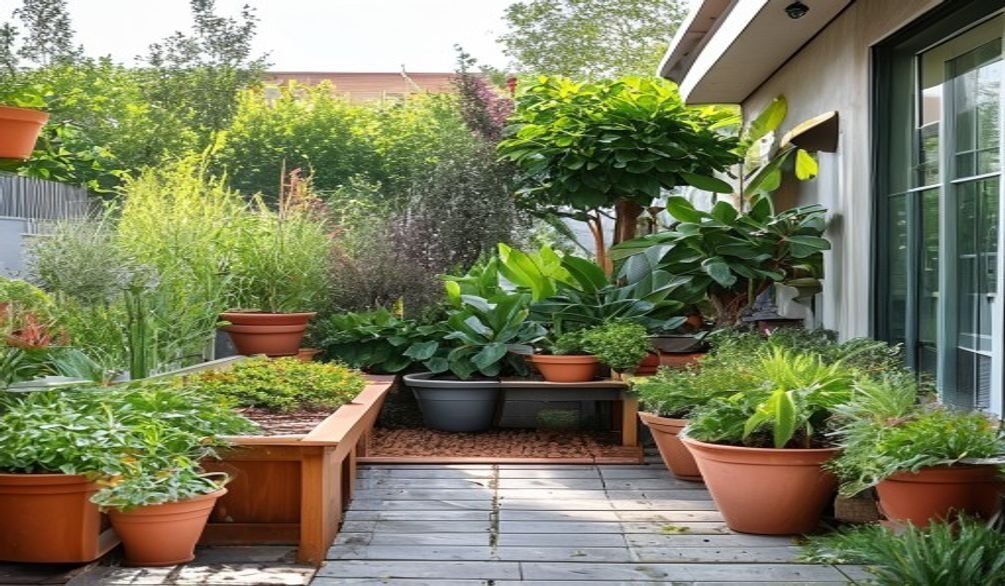
Drip irrigation represents a revolutionary approach to watering, especially for space-saving garden designs like vertical gardens. It employs micro watering devices positioned precisely near each plant, delivering water slowly and directly to the soil, ensuring the root zone receives optimal moisture.
This low-volume watering method stands apart from traditional sprinklers because it minimizes water loss to evaporation and runoff. The benefit for vertical gardens is profound: each plant in its individual pocket or container receives tailored hydration, preventing oversaturation or dehydration that can occur with overhead watering.
In practice, drip systems encourage deep roots by consistently moistening the soil around the plant base. This targeted delivery also helps prevent plant diseases that arise when water sits on foliage, a common issue in dense vertical garden setups.
Why Choose Drip Systems for Your Vertical Garden?
Opting for a drip irrigation for vertical garden setup offers a multitude of advantages that enhance both plant health and your gardening experience. The primary draw is undeniable: unparalleled water saving gardening.
According to Armstrong Garden Centers, drip irrigation boasts an efficiency rate of over 70% in the landscape, a stark contrast to typical pop sprinklers that waste significant water through overspray and runoff. To put this into perspective, a standard sprinkler might use 0.5 gallons per minute, while drip emitters use just 0.5 gallons per hour, showcasing incredible water conservation capabilities. This translates to substantial savings on your water bill and a reduced environmental footprint, making it a cornerstone of efficient garden irrigation.
Beyond conservation, drip systems offer incredible time savings. Gone are the days of individually hand-watering dozens of plants in your vertical display. With a drip system, you simply turn on the faucet, or even better, let an automatic watering system handle the schedule, freeing up your valuable time.
Another often-overlooked benefit is weed reduction. By delivering water only to your plants and not the surrounding soil, drip irrigation discourages weed seeds in unplanted areas from germinating, leading to less time spent on organic weed control.
Finally, these systems promote superior plant root health and consistent growth. The steady, gentle delivery of water prevents the stress of fluctuating moisture levels, leading to better vegetable yields and increased disease resistance. What most people miss is that this consistent, deep watering also fortifies plants against environmental stressors, making your vertical garden more resilient.
Key Components of a Vertical Garden Drip Irrigation System
Understanding the essential parts of a drip system is crucial for a successful vertical garden watering setup. While kits like the Rain Bird Landscape & Garden Drip Watering Kit offer comprehensive solutions, knowing each component helps in customization and troubleshooting.
- Connection to Water Source: This is typically an outdoor faucet or garden hose. You’ll need an adapter to connect your drip system.
- Pressure Regulator: Drip systems operate at much lower pressures than standard home water supplies. A pressure regulator reduces the water pressure to a safe level (usually 15-30 PSI) for your delicate drip components, preventing blowouts and leaks.
- Filter: Especially important if your water source has sediment. A filter prevents clogging of the tiny openings in your drip emitters, ensuring consistent water flow.
- Mainline Tubing: This larger diameter irrigation tubing (often 1/2″ or 3/4″) carries water from your source to the general planting area. It acts as the backbone of your system.
- Smaller Distribution Tubing: Also known as 1/4″ micro tubing, this branches off the mainline to reach individual plants or planting pockets in your vertical garden.
- Drip Emitters: These are the heart of the system. Drip emitters are clog-resistant devices that release water slowly at a specific rate (e.g., 0.5 or 1 gallon per hour). They are placed directly at the base of each plant. Various types exist, including inline emitters (integrated into the tubing) and individual drippers.
- Fittings and Connectors: These include T-connectors, elbows, end caps, and punch tools, which allow you to customize your tubing layout, direct water flow, and seal off lines.
My genuine insight here is that while many focus on the emitters, the pressure regulator and filter are non-negotiable. Skipping these often leads to frustration with broken components and clogged emitters down the line.
Step-by-Step Guide to Drip Irrigation Installation
Installing a DIY drip irrigation system for your vertical garden is a rewarding project that ensures efficient hydration. This guide provides a clear path to setting up your own vertical garden watering solutions.
1. Plan Your Layout
Before cutting any tubing, sketch out your vertical garden. Identify where each plant pocket or container is located and how water will flow from your main water source to each plant. Measure the distances to estimate the amount of mainline and distribution tubing you’ll need, along with the number of drip emitters. Consider the height and arrangement of your vertical garden panels or containers.
2. Connect to Your Water Source
Attach a backflow preventer (if not already integrated), then your pressure regulator, and finally a filter to your outdoor faucet. This sequence is crucial for protecting your system and ensuring clean, regulated water flow. Some kits combine these into a single faucet connection.
3. Lay the Mainline Tubing
Run your larger mainline tubing from the faucet connection to the base of your vertical garden structure. Secure it with stakes or clips to keep it tidy and prevent tripping hazards. You might need to run it along the top or side of your vertical garden, depending on its design.
4. Install Distribution Tubing and Emitters
This is where your vertical garden truly comes to life. Use a punch tool to create small holes in the mainline tubing where you want to branch off. Insert barbed connectors and attach the smaller 1/4″ distribution tubing. Run this tubing to each individual plant or container.
At each plant, insert a drip emitter directly into the 1/4″ tubing or use a stake to hold the emitter in place near the plant’s base. Ensure the emitter is close enough to the plant’s root zone to deliver water effectively. Rain Bird notes that their watering devices are clog-resistant and designed for dependable watering, ensuring consistent growth.
5. Secure and Test Your System
Once all tubing and emitters are in place, secure the distribution tubing with small stakes or clips. Cap off the ends of all mainline and distribution tubing with appropriate end caps. Slowly turn on your water supply and inspect the entire system for leaks or dry spots. Adjust emitters or connections as needed. What most people overlook is the initial test run; it’s vital for catching issues before they become problems.
Automating Your Vertical Garden Watering System
Transitioning from manual watering to an automatic plant watering for vertical gardens system is a game-changer for convenience and plant health. The secret lies in integrating a simple, reliable timer.
Automatic timers, readily available at any garden supply store, connect directly to your outdoor faucet before your pressure regulator and filter. These devices allow you to set specific watering schedules, dictating when and for how long your drip system operates. This means your plants receive consistent moisture even when you’re away or busy, a key factor in successful garden efficiency.
The beauty of automation is its ability to mimic ideal watering conditions. You can schedule short, frequent watering cycles, which is often best for vertical gardens where soil volume in individual pockets can be limited and dry out quickly. This consistent moisture delivery supports robust growth and minimizes plant stress.
My real-world observation is that starting with shorter watering durations and adjusting based on plant response and weather is always better than overwatering. Monitor your plants and soil moisture for the first few days after setting up your automated system to dial in the perfect schedule.
Tips for Maintaining Your Drip System for Long-Term Success
A well-maintained drip system will serve your vertical garden faithfully for years, ensuring continuous efficient garden irrigation. Here are practical tips for keeping your system in top shape:
- Regularly Check for Clogs: Drip emitters can occasionally become clogged by sediment or mineral buildup, even with a filter. Periodically inspect each emitter to ensure water is flowing freely. If an emitter is blocked, you can often clear it by gently poking the opening with a thin wire or by soaking it in a vinegar solution.
- Inspect for Leaks and Damage: Over time, tubing can develop small leaks from animal activity, garden tools, or UV exposure. Walk your vertical garden regularly, especially when the system is running, to spot any wet patches or sprays where they shouldn’t be. Repair or replace damaged sections promptly using appropriate connectors.
- Flush Your Lines Annually: At least once a year, remove the end caps from your mainline and distribution tubing and flush the system with full water pressure for a few minutes. This helps clear out any accumulated debris or sediment that could lead to future clogs.
- Winterize in Cold Climates: If you live in an area with freezing winters, it’s crucial to winterize your system. Disconnect it from the faucet, drain all water from the tubing and components, and store vulnerable parts like the filter and pressure regulator indoors. Freezing water can expand and crack tubing and fittings.
- Adjust Watering Schedules Seasonally: Plants have different water needs throughout the year. In hot, dry periods, you might need to increase watering frequency or duration. During cooler, rainy seasons, you can reduce it. An automated timer makes these adjustments simple, contributing to overall garden water conservation tips.
The short answer is that proactive maintenance prevents major headaches. A few minutes of attention each month can save you hours of troubleshooting and potential plant loss.
Frequently Asked Questions
How often should I water my vertical garden with drip irrigation?
The ideal watering frequency for your vertical garden with drip irrigation depends on several factors, including plant type, container size, sun exposure, and local climate. A good starting point is to water for 10-15 minutes, 2-3 times a week, and then adjust based on soil moisture and plant health. Smaller containers and plants in full sun typically require more frequent watering.
Can I use a DIY drip system for any type of vertical garden?
Yes, a DIY drip system is highly adaptable and can be configured for almost any type of vertical garden, from pocket planters to tiered shelves or pallet gardens. The key is to customize the layout of your mainline and distribution tubing, along with the placement and flow rate of your drip emitters, to match the specific needs and arrangement of your plants. This flexibility makes it a versatile vertical garden watering solution.
What are the most common problems with drip irrigation systems?
The most common problems with drip irrigation systems include clogged emitters, leaks in the tubing, and insufficient water pressure. Clogs are often caused by sediment or mineral buildup and can be prevented with a good filter and regular flushing. Leaks usually result from physical damage or improper connections, while pressure issues typically stem from not using a pressure regulator or having too many emitters for the system’s capacity.
How do I clean my drip irrigation emitters?
To clean drip irrigation emitters, first, turn off the water supply to the system. For minor clogs, you can often clear them by gently poking the emitter’s opening with a thin wire or a specialized punch tool. For more stubborn blockages, you might need to remove the clogged emitters and soak them in a solution of vinegar or a commercial drip system cleaner to dissolve mineral deposits. Regularly flushing your entire system also helps prevent buildup.
Embracing drip irrigation for vertical garden setups is a smart move for any gardener seeking efficiency, sustainability, and thriving plants. By following this detailed guide, you can confidently install and maintain a system that provides precise hydration, conserves water, and frees up your time. Start planning your efficient garden irrigation system today to unlock the full potential of your vertical greenery!