Imagine a garden bursting with vibrant color and unique forms, dazzling from mid-summer straight through to the first frost. This dream becomes a reality with dahlias, the showstopping tender perennials that offer an unparalleled display of floral beauty. If you’re ready to transform your outdoor space, mastering the art of growing dahlias is your ticket to a season of stunning blooms.
From delicate pompons to dramatic dinner plates, dahlias offer an incredible diversity that captivates gardeners worldwide. While they might seem intimidating at first glance, with the right knowledge and a little consistent care, you can cultivate these magnificent flowers with great success. This comprehensive guide will walk you through every step, ensuring your dahlia patch thrives and produces an abundance of breathtaking blossoms.
Dahlia Basics: Understanding Your Stunning Summer Blooms
Dahlias are native to the warm climates of Mexico and Central America, which explains their love for sunshine and their sensitivity to cold. These incredible plants grow from underground tubers, producing an array of flowers that can range from petite two-inch buttons to colossal ten-inch “dinner plate” blooms. Their season truly begins in mid-summer and continues relentlessly until the first hard frost of autumn.
For optimal growth and prolific flowering, dahlias demand a prime location in your garden. They absolutely thrive in a spot that receives at least six to eight hours of direct sunlight every single day. Without adequate sun, you risk sparse blooms and leggy plants. If you’re unsure about your garden’s sun exposure, check out our Essential Guide for Beginner Gardeners on Gardening Sunlight.
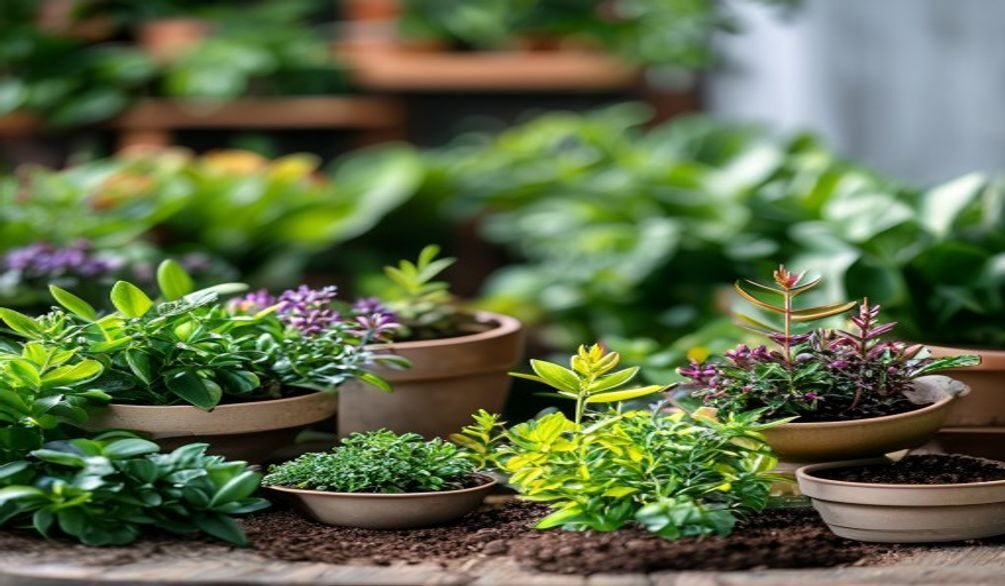
The right soil is equally crucial for these thirsty, hungry beauties. Dahlias prefer fertile, moist, yet exceptionally well-drained soil. A slightly acidic to neutral pH, ideally between 6.5 and 7.0, is perfect. Heavy clay soils that retain too much water can lead to tuber rot, so amending with generous amounts of compost or other organic matter is essential. For areas with very poor drainage, consider planting your dahlias in raised beds to ensure their roots stay happy and healthy.
Planting Dahlia Tubers: Timing, Soil & Depth
The success of your dahlia season largely hinges on proper planting. Timing is everything when it comes to getting these tender tubers into the ground. Wait until all danger of spring frost has completely passed, and the soil temperature has consistently warmed to at least 60°F (15°C). This typically means mid-to-late spring in most temperate climates.
Many experienced gardeners get a head start by planting their dahlia tubers indoors in pots about 4-6 weeks before the last frost date. This practice allows the tubers to sprout and develop a robust root system, giving you earlier blooms once they are transplanted outdoors. Just be sure to harden them off gradually before moving them permanently.
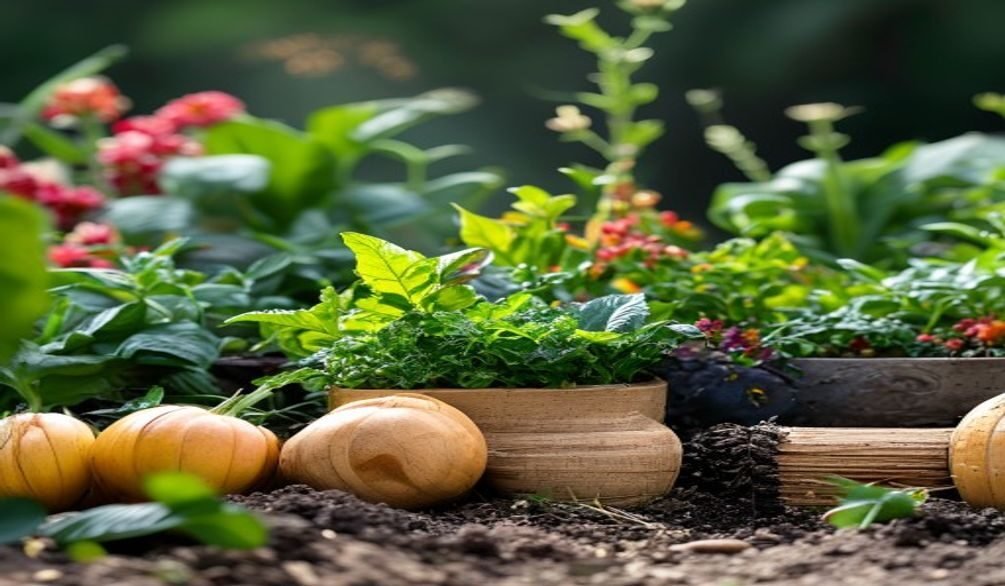
Preparing the Perfect Planting Bed
Dahlias are heavy feeders and appreciate a rich environment. Before planting, prepare your soil by incorporating a generous amount of well-rotted compost, aged manure, or other organic matter. This improves soil structure, drainage, and fertility, setting your dahlias up for success. If you’re working with heavy clay, raised beds are an excellent solution to prevent waterlogging.
When it’s time to plant, dig a hole approximately 4-6 inches deep. Place the dahlia tuber horizontally in the hole, ensuring the “eye” or sprout is facing upwards. This small bump on the tuber is where the new shoot will emerge. If you’re planting multiple dahlias, be mindful of spacing: give border types 12-15 inches, standard varieties 18-24 inches, and giant “dinner plate” types 24-36 inches to grow and flourish.
After planting, cover the tuber lightly with soil. Resist the urge to water heavily immediately; a light initial watering is sufficient. Overwatering at this stage can cause the dormant tuber to rot before it has a chance to sprout. Wait until you see green shoots emerging from the soil before you begin a more regular watering schedule. For more general planting tips, our Beginner’s Steps to Successful Planting can offer helpful foundational knowledge.
Essential Dahlia Care: Watering, Fertilizing & Support
Once your dahlias are actively growing and reach about 8-12 inches tall, their needs will shift. Consistent and attentive dahlia care during the growing season is paramount for a spectacular display. These plants are not low-maintenance, but their rewards are truly worth the effort.
Watering Your Thirsty Dahlias
Dahlias are thirsty plants, especially once they are established and the weather heats up. They require consistent, deep watering two to three times a week, particularly during hot, dry periods. The goal is to keep the soil evenly moist but never waterlogged. Stick your finger into the soil; if it feels dry an inch or two down, it’s time to water. Dahlias grown in containers will dry out much faster and may need daily watering during peak summer.
Feeding Your Flowering Machines
As heavy feeders, dahlias benefit significantly from regular fertilization. The key is to use a low-nitrogen fertilizer, often referred to as a “bloom booster,” with a higher percentage of phosphorus and potassium. Look for NPK ratios like 5-10-10 or 4-10-10. Too much nitrogen will encourage lush foliage at the expense of flowers, which is the opposite of what you want!
Begin fertilizing approximately 30 days after planting, once the plants are well-established. For dahlias in the ground, repeat this process monthly throughout the growing season. If you’re growing dahlias in containers, they will need more frequent feeding, typically every 2-3 weeks, as nutrients leach out of pots more quickly. For a reliable source of general dahlia growing and care tips, consult the Proven Winners Dahlia Guide.
Providing Essential Support
Many dahlia varieties, especially the taller types with large, heavy blooms, require staking. Without proper support, their stems can easily snap in wind or under the weight of their flowers. It’s best to place stakes at planting time, so you don’t risk damaging the tubers later. Drive a sturdy stake (bamboo, metal, or wood) 1-2 feet deep into the ground, about 4-6 inches away from where you planted the tuber.
As the plant grows, gently tie the main stem to the stake using soft ties or garden twine, ensuring you don’t constrict the stem. Tomato cages can also be an effective alternative for providing all-around support, especially for bushier varieties. Providing this support early on will save you heartache later when your plants are laden with magnificent blooms.
Pinching & Deadheading for Abundant Dahlia Flowers
If you dream of a garden overflowing with dahlia blooms, two crucial techniques will help you achieve that goal: pinching and deadheading. These simple practices encourage bushier plants and a continuous flush of flowers throughout the season.
Pinching for Bushier Plants
Pinching is the act of removing the main growing tip of your dahlia plant. This encourages the plant to produce more lateral branches, resulting in a bushier habit and, most importantly, more flowers! Perform this when your dahlia plant is about 12-16 inches tall and has at least four sets of true leaves.
Here’s how to pinch:
- Locate the main stem and count up to the fourth set of leaves from the bottom.
- Using sharp, clean pruners or your fingernails, snip or pinch off the very top growth tip, just above the fourth set of leaves.
- This action sends a signal to the plant to put its energy into developing the side shoots, which will then produce flowers.
Don’t be afraid to pinch; it might feel counterintuitive to remove growth, but it’s a vital step for maximizing your bloom count.
Deadheading for Continuous Blooms
Deadheading is the practice of removing spent or faded flowers. This is essential for encouraging your dahlias to produce new blooms continuously. If you allow old flowers to remain on the plant, the plant will put its energy into producing seeds rather than more flowers, effectively signaling an end to its blooming cycle.
To deadhead effectively:
- Inspect your plants regularly, at least every few days, for faded flowers.
- Trace the stem of the spent flower down to a leaf node where new buds or leaves are emerging.
- Make a clean cut just above this node. This ensures the plant can quickly channel energy into new growth.
Regular deadheading not only promotes more flowers but also keeps your plants looking tidy and vibrant throughout the entire season, ensuring a stunning display of summer blooms.
Overwintering Dahlias: Protecting Tubers for Next Season
Since dahlias are tender perennials, their tubers cannot survive freezing temperatures. In most colder climates (USDA Zones 7 and below), you’ll need to dig up and store your dahlia tubers indoors for the winter. This practice, known as overwintering, ensures you can enjoy your favorite varieties year after year. In milder climates (Zone 8 and above), with adequate mulching, tubers may sometimes survive in the ground.
When to Dig
Wait until after the first hard killing frost has blackened the foliage of your dahlia plants. This frost signals the plant to send all its remaining energy back down into the tubers, preparing them for dormancy. Don’t rush this step; leaving them in the ground for about a week after the frost can help them store more energy.
The Digging Process
- Cut Back Stems: Cut the main stems down to about 4-6 inches above the ground.
- Carefully Dig: Using a garden fork or spade, gently dig a wide circle around the plant, about 12 inches from the stem. Carefully loosen the soil, then gently pry the entire clump of tubers out of the ground. Be extremely careful not to damage the delicate “necks” where the tubers connect to the stem, as this is where the new growth eyes are.
- Clean Tubers: Gently shake off as much soil as possible. You can rinse them lightly with a hose to remove stubborn dirt, but avoid excessive scrubbing.
- Dry Thoroughly: Place the cleaned tubers in a cool, dry, well-ventilated area for a few days to “cure” or dry out. This helps prevent rot during storage.
Storing for Winter
Once the tubers are dry, you can prepare them for storage. Some gardeners prefer to divide their tubers in the fall, while others wait until spring. If dividing in fall, ensure each division has at least one visible “eye” and a piece of the old stem. For more on safe storage practices, you might find our guide on Drying & Storing Herbs helpful for general principles.
Store your tubers in a cool, dark, frost-free location where temperatures remain consistently between 40-50°F (4-10°C). Good options include a cool basement, unheated garage, or crawl space. Pack the tubers in breathable containers like cardboard boxes, plastic bins, or paper bags. Surround them with a moist, but not wet, insulating medium such as peat moss, vermiculite, sawdust, or shredded newspaper. Check on your tubers periodically throughout the winter to ensure they aren’t shriveling (add a little moisture if they are) or rotting (remove any affected tubers immediately).
Troubleshooting Common Dahlia Problems
Even with the best intentions, gardeners can encounter challenges when growing dahlias. Knowing how to identify and address common issues will help you keep your plants healthy and blooming beautifully.
Why Aren’t My Dahlias Blooming?
This is one of the most common frustrations for dahlia growers. Several factors can contribute to a lack of blooms:
- Insufficient Sunlight: Dahlias need 6-8 hours of direct sun. Shady conditions lead to fewer flowers.
- Too Much Nitrogen: Over-fertilizing with high-nitrogen formulas (like those for lawns) promotes leafy growth at the expense of flowers. Switch to a low-nitrogen, high-phosphorus/potassium blend.
- Lack of Pinching/Deadheading: As discussed, these techniques are vital for encouraging continuous bloom production.
- Underwatering: Stressed plants won’t bloom. Ensure consistent, deep watering once established.
Yellowing Leaves and Other Foliage Issues
Yellowing leaves can signal several problems:
- Overwatering or Poor Drainage: This is a common culprit, leading to root rot. Ensure your soil is well-drained.
- Nutrient Deficiency: Particularly iron or magnesium. A balanced fertilizer or specific nutrient supplement can help.
- Pests: Severe infestations can cause leaf discoloration.
- Underwatering: Leaves may also turn yellow and crispy at the edges.
Dealing with Dahlia Pests
Dahlias are attractive to various garden pests. Employing an Integrated Pest Management (IPM) approach, focusing on prevention and organic solutions, is often the most effective strategy.
- Slugs and Snails: These pests love tender dahlia shoots. Use organic bait like Sluggo Plus, create beer traps, or hand-pick them in the evening.
- Aphids: Small, soft-bodied insects that cluster on new growth. Spray with a strong stream of water, insecticidal soap (like Safer Soap), or neem oil.
- Spider Mites: Tiny pests that thrive in hot, dry conditions, causing stippling on leaves. Increase humidity and spray with insecticidal soap or neem oil.
- Earwigs: They feed on petals and leaves, especially at night. Set traps (like rolled-up newspapers) and dispose of them.
- Thrips: Minute insects that cause streaking and distortion in flowers. Use neem oil or spinosad-based sprays.
Regular inspection of your plants is key to catching problems early. For more detailed pest and disease advice, the RHS Dahlia Growing Guide is an excellent resource.
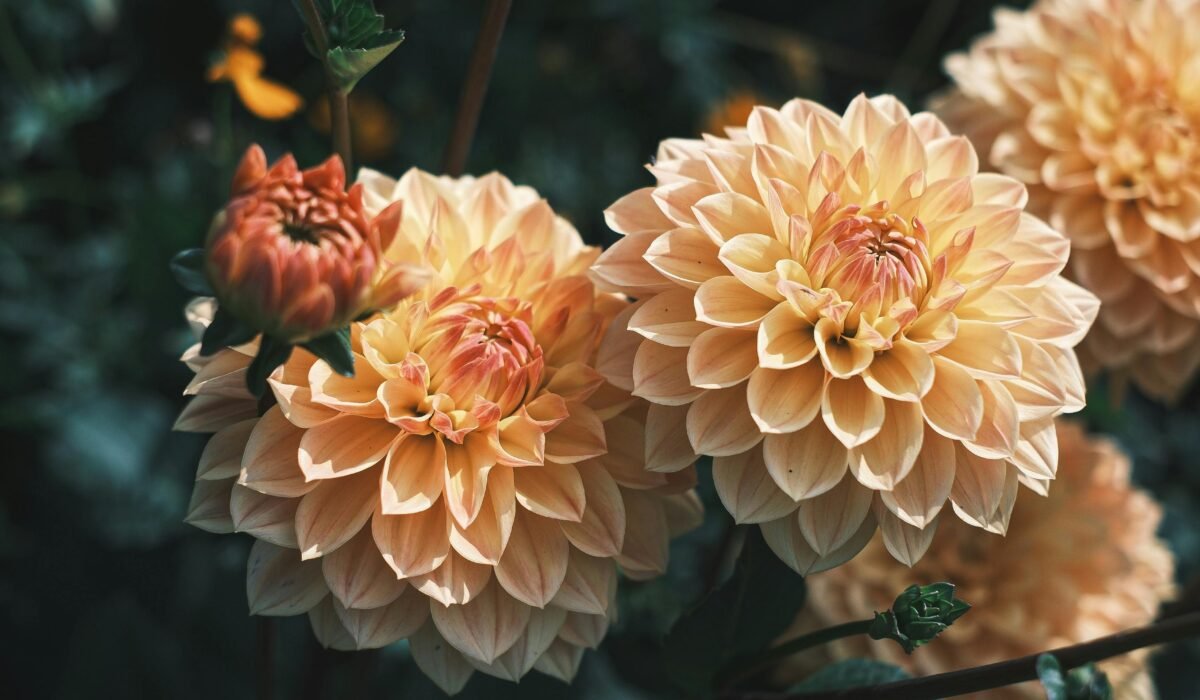
Top Dahlia Varieties & Growing for Cut Flowers
One of the most exciting aspects of growing dahlias is the sheer variety available. With thousands of cultivars, classified by their flower shape (e.g., single-flowered, waterlily, anemone, ball, pompon, cactus, decorative), you can find a dahlia for every aesthetic. Many gardeners also specifically grow dahlias for their exceptional qualities as cut flowers, bringing the garden’s beauty indoors.
Popular Dahlia Varieties to Consider
Whether you’re looking for dramatic focal points or charming bouquet fillers, there’s a dahlia for you:
- ‘Cafe Au Lait’: Often dubbed the “Queen of the field,” this dinner plate dahlia boasts large, creamy, coffee-toned blooms that are highly sought after for weddings and elegant arrangements.
- ‘Cornel’: A classic cherry-red ball dahlia, known for its perfect spherical form and excellent vase life. ‘Cornel Bronze’ offers a beautiful coppery-bronze alternative.
- ‘Snoho Doris’: A delightful ball dahlia with a captivating mix of coral, peach, and apricot hues, perfect for adding warmth to bouquets.
- ‘Linda’s Baby’: A charming peach-colored dahlia that consistently produces abundant blooms, making it a favorite for cut flower growers.
- ‘Molly Raven’: This variety stands out with its dark foliage and unique two-tone flowers, often with a deep purple center fading to lighter edges. It’s also excellent for container growing.
- ‘Totally Tangerine’: An anemone-form dahlia with vibrant orange petals and a fluffy central cushion, adding a unique texture and pop of color.
Exploring the vast world of dahlias can be a lifelong passion. For an extensive look at different types and classifications, visit The American Dahlia Society website.
Growing Dahlias for Cut Flowers
Dahlias are a cut flower gardener’s dream, providing an abundance of long-lasting blooms. Here are some tips for maximizing your harvest:
If your aim is a dedicated space for floral arrangements, our guide on Creating a Stunning Cut Flower Garden provides even more insights.
- Choose Productive Varieties: While all dahlias can be cut, some varieties are bred for prolific blooming and strong stems suitable for arrangements. Look for varieties specifically noted for “cut flower” use.
- Harvest in the Morning: The best time to cut dahlia blooms is in the early morning, after the dew has dried but before the heat of the day sets in. Flowers are most hydrated at this time.
- Cut Long Stems: Cut stems as long as possible, making sure to leave at least two sets of leaves on the main plant to encourage new growth and more blooms.
- Condition Your Flowers: Immediately after cutting, plunge the stems into a bucket of cool water. Remove any foliage that would fall below the waterline in your vase. Allow them to hydrate in a cool, dark place for a few hours before arranging. This “conditioning” significantly extends their vase life.
- Regular Harvesting: Treat cut flower dahlias like deadheading – the more you cut, the more they will produce! Regular harvesting encourages the plant to continue setting new buds.
By following these tips, you’ll be able to enjoy armloads of fresh dahlia blooms from your garden, gracing your home with their unparalleled beauty for weeks on end.
Growing dahlias is a truly rewarding endeavor that brings unparalleled beauty to any garden. From the thrill of planting the tubers in spring to the joyous abundance of their summer blooms, the journey is as delightful as the destination. While they do ask for a little attention with their watering, fertilizing, and overwintering needs, the spectacular floral show they provide makes every effort worthwhile.
Don’t let their glamorous appearance fool you into thinking they’re too difficult. Embrace the process, follow this guide, and prepare to be amazed by the stunning summer blooms these magnificent plants will produce. So, choose your favorite varieties, get your garden tools ready, and embark on your dahlia adventure today. Share your success stories and vibrant photos with us – we can’t wait to see your dahlias flourish!