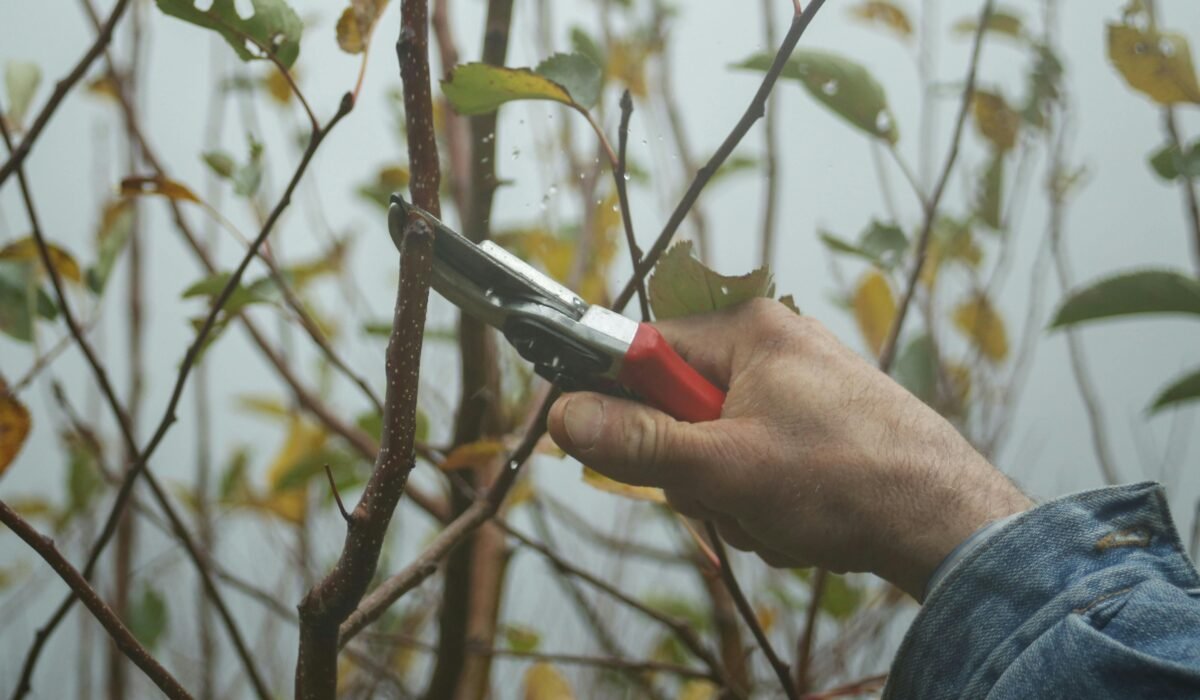
Feeling a bit nervous about tackling those overgrown branches? You’re not alone! Many new gardeners approach pruning basics for beginners with hesitation, fearing they might harm their precious plants. This guide will equip you with simple steps and the confidence you need to make smart cuts for healthier, more beautiful growth.
Why Pruning Matters for Plant Health
Pruning isn’t just about aesthetics; it’s a vital practice for ensuring robust plant health and vigor. By making strategic cuts, you encourage stronger growth and better overall structure.
The short answer is, pruning helps your plants thrive in several key ways. It removes problematic parts, redirects energy, and shapes the plant for optimal performance.
Encouraging Stronger Growth and Vigor
When you prune, you’re essentially telling the plant where to direct its energy. Removing weak or crowded branches allows more light and air to penetrate the plant, stimulating new, healthier growth.
As Jack Stooks, former Head Gardener to King Charles, explains, “By cutting things down, you’re always trying to encourage growth to come from the very base of the plant.” This process keeps the plant vibrant by cycling out old wood for new, productive material.
Removing Dead, Damaged, or Diseased Branches
One of the most critical reasons to prune is to eliminate the “three D’s”: dead branches, damaged branches, or diseased branches. These parts are not only unproductive but can also become entry points for pests and pathogens.
Removing them prevents the spread of disease and reduces the plant’s stress, allowing it to focus resources on healthy tissue. This is a fundamental aspect of maintaining a resilient garden.
Improving Air Circulation and Light Penetration
Dense foliage can create humid, shaded conditions that are perfect breeding grounds for fungal diseases. Thinning out overcrowded areas improves air circulation, which helps dry leaves faster after rain or watering.
Increased light penetration also ensures that inner branches receive enough sunlight for photosynthesis, leading to more uniform growth and better flowering or fruiting.
Overcoming the Fear of Pruning: A Beginner’s Guide
It’s completely normal to feel anxious about making that first cut. Acclaimed gardener Monty Don admits that “pruning can cause ‘some anxiety’,” a sentiment shared by many new gardeners.
What most people miss is that plants are incredibly resilient and often respond positively to pruning. Think of it as guiding their natural growth, not harming it.
Understanding Plant Resilience
Plants have an innate desire to grow and heal. A well-placed cut, even if initially daunting, typically stimulates new growth. They want to bounce back, often stronger than before.
Gardening author Janet Macunovich offers reassuring advice: “If a bush is too big, don’t ask ‘should I?’ Go ahead and cut it. If it lives, great. If it dies, replace it with something better suited.” This perspective empowers you to experiment and learn.
Starting Small: The “Less is More” Approach
For pruning basics for beginners, always remember the “less is more” rule. It’s easier to remove a little more later than to put back what you’ve already cut.
A good rule of thumb, supported by the University of New Hampshire Extension, is to remove no more than one-third of a plant’s total growth each year. This prevents excessive stress and promotes healthy recovery.
Essential Pruning Tools & How to Use Them
Having the right pruning tools makes all the difference in achieving clean, effective cuts and ensuring your safety. The global pruning tools market is booming, valued at $2.8 billion in 2025 and projected to reach $4.6 billion by 2034, reflecting the growing interest in home gardening, according to market data.
For basic pruning tools, you don’t need an arsenal; a few quality items will serve you well.
Hand Pruners (Bypass vs. Anvil)
Hand pruners are your most frequently used tool for small branches, typically up to 3/4 inch in diameter. They held the largest product type share at 34.2% of total market revenue in 2025.
- Bypass Pruners: These work like scissors, with two blades that bypass each other. They create clean, precise cuts that are ideal for live wood, minimizing damage to plant tissue. Brands like Felco (e.g., Felco 6, Felco 8) are top-tier, while Fiskars offers affordable, effective options for beginners.
- Anvil Pruners: These have a sharp blade that closes onto a flat anvil. They are better suited for cutting dead or tough wood, as they can crush live stems. For how to prune plants effectively, bypass pruners are usually preferred for living material.
Loppers for Thicker Branches
When you encounter branches too thick for hand pruners (up to 2 inches in diameter), loppers are your go-to. Their long handles provide leverage, making it easier to cut through tougher wood.
Like hand pruners, loppers come in bypass and anvil styles, with bypass being the better choice for live branches. Look for models with comfortable grips and durable blades.
Pruning Saws for Larger Limbs
For branches exceeding 2 inches in diameter, a pruning saw is indispensable. These saws have specialized teeth designed to cut through wood efficiently.
Folding saws are particularly convenient for home gardeners. Always use a saw for larger cuts to avoid tearing bark, which can severely damage the plant.
The 3 Basic Pruning Cuts & When to Use Them
Mastering the fundamental pruning techniques involves understanding just a few key cuts. These simple actions form the foundation of effective pruning, allowing you to shape plants and direct their growth.
Knowing types of pruning cuts and their purpose is crucial for healthy plant development.
1. Thinning Cuts
Thinning cuts involve removing an entire branch back to its point of origin – either the main stem, a lateral branch, or the ground. This method helps to:
- Reduce density: Improves air circulation and light penetration within the plant.
- Maintain natural form: Doesn’t stimulate excessive regrowth at the cut point, unlike heading cuts.
- Direct growth: Encourages growth from the remaining branches.
Use thinning cuts to remove weak, crossing, or inward-growing branches, opening up the plant’s canopy.
2. Heading Cuts
Heading cuts involve shortening a branch back to a bud, a side branch, or a specific length. This type of cut is used to:
- Stimulate bushiness: Encourages dormant buds below the cut to sprout, creating a denser plant.
- Reduce plant size: Useful for controlling the height or spread of a plant.
- Promote flowering/fruiting: Can encourage more flower or fruit production on certain plants.
When making a heading cut, always cut just above an outward-facing bud or side branch to encourage growth in the desired direction.
3. Removal Cuts (The Three-Cut Method for Large Branches)
For removing larger branches (those requiring a saw), the three-cut method prevents bark tearing, which can severely wound the tree. This is especially important for how to prune plants without causing long-term damage.
- First Cut (Undercut): Make a shallow cut on the underside of the branch, about 6-12 inches from the trunk. This prevents the bark from tearing down the trunk when the branch falls.
- Second Cut (Top Cut): About 1-2 inches further out from the undercut, cut through the top of the branch until it falls. This removes the bulk of the branch.
- Third Cut (Final Cut): Carefully cut the remaining stub just outside the branch collar (the swollen area where the branch meets the trunk). Do not cut into the branch collar, as this area contains vital cells for wound healing.
When to Prune: Timing for Optimal Plant Growth
Knowing when to prune plants is as important as knowing how to make the cuts. Incorrect timing can reduce flowering, stress the plant, or even invite disease.
The general rule for seasonal pruning revolves around a plant’s flowering cycle and dormant periods.
Pruning During Dormancy (Late Winter)
For most deciduous trees and shrubs, the ideal time for significant pruning is late winter, while the plant is dormant and before new growth begins. This includes many shade trees and fruit trees like apples and pears. Pruning fruit trees simple guide often emphasizes late winter dormancy.
Why? Without leaves, you can clearly see the plant’s structure, making it easier to identify dead branches or crossing limbs. The plant is also less susceptible to disease during dormancy, and it will respond with vigorous new growth in the spring.
Pruning After Flowering (Spring-Flowering Plants)
Spring-flowering plants (like Forsythia, Lilacs, Rhododendrons, and Azaleas) produce their blooms on “old wood” – growth from the previous season. To ensure a spectacular display next year, you should prune these immediately *after* they finish flowering.
Pruning too late in the season, or before they flower, would remove the very buds that produce those beautiful blossoms.
Pruning Before Growth Begins (Summer-Flowering Plants)
Conversely, summer-flowering plants (such as Hydrangeas, Crape Myrtles, and many rose varieties) bloom on “new wood” – growth from the current season. These are best pruned in late winter or early spring, just before new growth starts.
This timing allows the plant to put energy into developing new stems that will bear flowers later in the season. For when to prune shrubs like these, early spring is key.
Common Pruning Mistakes and How to Avoid Them
Even with the best intentions, it’s easy to make pruning mistakes that can harm your plants. Recognizing these pitfalls is the first step to becoming a confident pruner.
Understanding these common errors helps you make smarter decisions and avoid weakening your plants.
Over-Pruning (The “One-Third Rule”)
One of the most frequent mistakes is removing too much plant material at once. Over-pruning stresses the plant, forcing it to expend excessive energy on regrowth, often resulting in weak, leggy shoots (water sprouts or suckers).
Always adhere to the “one-third rule”: never remove more than one-third of a plant’s total canopy in a single year. This allows the plant to recover effectively and maintain its health, as emphasized by the University of New Hampshire Extension.
Leaving Stubs or Flush Cuts
Improper cuts can create problems. Leaving a stub (a short piece of branch after cutting) provides an entry point for disease and pests, as the stub often dies back. Similarly, making a “flush cut” (cutting too close to the main trunk, into the branch collar) damages the plant’s natural healing zone.
Always aim for a clean cut just outside the branch collar for proper wound closure. This area is crucial for the plant’s ability to seal off the wound.
Using Dull or Dirty Tools
Dull tools crush plant tissue rather than cutting it cleanly, leaving ragged wounds that are slow to heal and susceptible to disease. Dirty tools can also spread pathogens from one plant to another.
Always ensure your pruning tools are sharp and clean before and during use. This promotes quick healing and prevents the spread of infection.
Pruning Specific Plants: Quick Guides for Popular Varieties
While general pruning techniques apply broadly, certain plants benefit from specific approaches. Here’s a plant pruning guide for some popular garden favorites.
Tailoring your pruning to the plant’s needs ensures optimal blooms, fruit, and overall vitality.
Pruning Roses for Beginners
Pruning roses for beginners often seems intimidating, but it’s essential for vigorous growth and abundant blooms. Most modern roses (hybrid teas, floribundas) bloom on new wood.
- Timing: Late winter or early spring, just as buds begin to swell.
- Goal: Remove dead, damaged, or weak canes. Open up the center for air circulation. Shape the plant.
- Method: Make cuts at a 45-degree angle about 1/4 inch above an outward-facing bud. Remove any suckers growing from below the graft union.
Pruning Hydrangeas
Hydrangea pruning depends on the type:
- Bigleaf (Hydrangea macrophylla) & Oakleaf (Hydrangea quercifolia): Bloom on old wood. Prune immediately after flowering to remove spent blooms and shape. Avoid heavy pruning.
- Smooth (Hydrangea arborescens, e.g., ‘Annabelle’) & Panicle (Hydrangea paniculata, e.g., ‘PeeGee’, ‘Limelight’): Bloom on new wood. Prune in late winter or early spring to encourage strong new stems and larger flowers. You can prune these quite hard.
Pruning Fruit Trees
Fruit trees like apples and peaches require specific pruning to encourage fruit production and maintain an open, strong structure. This typically involves a combination of thinning and heading cuts.
Timing: Late winter during dormancy is generally best for most fruit trees. For more detailed information, consider our guide on Pollinating Fruit Trees: Boost Your Backyard Harvest.
Pruning Overgrown Shrubs
For overgrown shrubs like Hollies or Forsythia, rejuvenation pruning can be very effective. This involves cutting all branches back to within several inches of the ground in late winter.
While drastic, this stimulates vigorous new growth from the base, essentially resetting the plant. Only do this for shrubs known to tolerate hard pruning.
Beyond the Basics: Tool Care and Sterilization
Proper tool care extends the life of your pruning tools and, more importantly, protects your plants from disease. This is a critical step often overlooked by beginners.
Tool sterilization is paramount, especially when moving between different plants or if you suspect disease.
Cleaning and Sharpening Your Tools
After each use, clean your tools thoroughly to remove sap, soil, and plant debris. A stiff brush and warm, soapy water work well. This prevents rust and keeps the blades from gumming up.
Regular sharpening ensures your tools make clean cuts, reducing stress on the plant and making your job easier. Dull blades tear and bruise plant tissue, creating entry points for pathogens.
The Importance of Tool Sterilization
Sterilizing your tools prevents the spread of diseases like powdery mildew, cankers, or bacterial blight from one plant to another. If you’re cutting diseased material, sterilize after every cut.
Here’s how to do it effectively:
- Isopropyl Alcohol: Wipe blades thoroughly with a cloth soaked in 70% or higher isopropyl alcohol. This is quick and effective.
- Bleach Solution: A 10% bleach solution (1 part bleach to 9 parts water) can also be used, but rinse tools thoroughly afterward to prevent corrosion.
- Between Cuts: Especially when dealing with diseased plants, sterilize your tools between each cut. For more on plant diseases, see our guide on Powdery Mildew Control.
Frequently Asked Questions
What are the 3 basic pruning cuts?
The three basic pruning cuts are thinning cuts, heading cuts, and removal cuts (often using the three-cut method for larger branches). Thinning removes entire branches to improve air circulation and light, heading shortens branches to encourage bushiness, and removal cuts are for larger limbs, meticulously executed to protect the plant’s collar.
What are the 4 main types of pruning?
While there are many specific pruning techniques, the 4 main types of pruning broadly refer to: 1) Thinning (removing entire branches), 2) Heading (shortening branches), 3) Shearing (uniform trimming, often for hedges), and 4) Rejuvenation/Renewal Pruning (severe cutting back to stimulate vigorous new growth). Each serves a distinct purpose for plant health and form.
What is the 3 D’s rule of pruning?
The “3 D’s” rule of pruning is a simple guideline for what to remove first: Dead, Damaged, or Diseased branches. Prioritizing these cuts helps maintain plant health, prevents the spread of pathogens, and directs the plant’s energy towards productive, healthy growth. It’s often the starting point for any pruning session.
What are the most important things to know about pruning?
The most important things to know about pruning are to use clean, sharp tools; understand the specific needs and flowering habits of each plant; never remove more than one-third of a plant’s growth in a single year; and always make cuts just outside the branch collar or above an outward-facing bud. Overcoming the fear of pruning by starting small and learning from experience is also crucial for success.
Armed with these pruning basics for beginners, you’re ready to approach your garden with confidence and a clear purpose. Remember that every cut you make contributes to the long-term health and beauty of your plants.
Start small, observe how your plants respond, and enjoy the rewarding process of shaping your garden. Grab your sharp bypass pruners and step out there – your plants are waiting to thrive!